World of Level Design™
Tutorials to Becoming the Best Level Designer and Game Environment Artist (since 2008)
My System for Setting Up Game Environment Projects for Maya LT/Maya, UE4 & Texturing
Category: UE4
September 07, 2017
When working to create a game environment or custom assets set such as Static Meshes, you'll be using 3d modeling/sculpting software (Maya LT, Maya, 3dsMax, Modo, Blender, Mudbox, ZBrush etc.), texturing software (Photoshop/Gimp, Substance, Quixel etc.) and Unreal Engine 4.
In order to keep all the files organized between different software you need a system. A way to maintain consistency and organize your project files.
In this tutorial I'll share a system I currently use and how I set everything up.
Note that this is something I'm using right now but it is always evolving and improving. You don't have to use this specific way and it is definitely not the only way. In fact, I just recently modified it.
If you have your own system that works better, share it with me.
Before you start working on any game environment or custom assets project for Unreal Engine 4 here is what to do.
Define Project Name and Folder
On my "E" drive I have a folder created called "Projects". This folder contains all the projects I am working on:

Decide on the project name. In this tutorial I will use "WoLDTutorials".
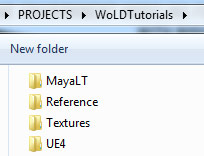
Create new folder and name it:
![]()
Avoid using spaces in the name and if you need to separate for readability, use dashes.
Inside "WoLDTutorials" folder, I create additional sub-folders. These are:
- MayaLT or Maya: will contain Maya LT/Maya project related files
- UE4: will contain UE4 related files such as maps, materials and all imported assets (Static Meshes, textures)
- Textures: will contain work-in-progress texture files (.PSD) and final textures
- Reference: will contain image reference, concept art, sketches, concept art
Create any other additional folder you need.
I also create a "WoLDTutorials-Notes" text document which will contain to do lists, bugs, fixes, changes and various notes on the project:

Maya LT/Maya Project
Let's set up Maya LT/Maya Project.
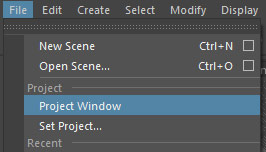
Launch Maya LT/Maya and go to "File > Project Window":
Give project a name and click on "New". In my case it is "WoLDTutorials":

Define "Location", a directory where this project folder will be stored in. Navigate to "Projects/WoLDTutorials" folder and into "MayaLT" or "Maya" folder:

"Primary Project Locations" are sub-folders that Maya LT/Maya creates to keep all its files organized. If you know which folders you do not need, you can remove the name and that folder will not be created.
I keep "Primary Project Locations" names as default and click "Accept":

Maya LT/Maya creates a project folder with all required sub-folders:

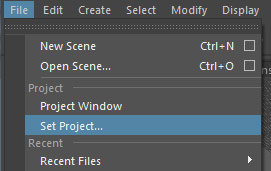
If you need to set Maya LT/Maya to an existing project, go to "File > Set Project":
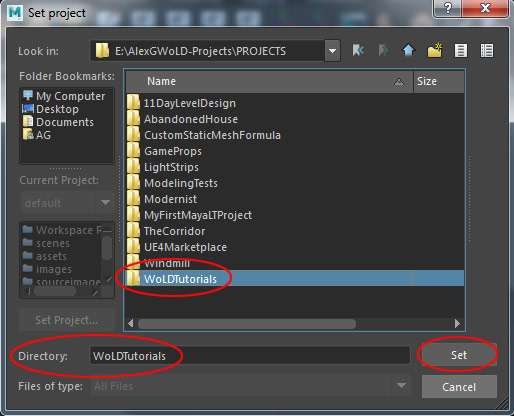
Choose project folder to set and click "Set":
Unreal Engine 4 Project
Now, let's set up Unreal Engine 4 project.
Launch "UE4 Launcher" and go to "Library" and use drop-down menu to choose which engine version to launch and click "Launch":

You can also click on UE4 version icons at the top:

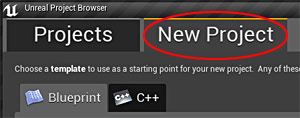
Unreal Project Browser will open; switch to "New Project" tab:
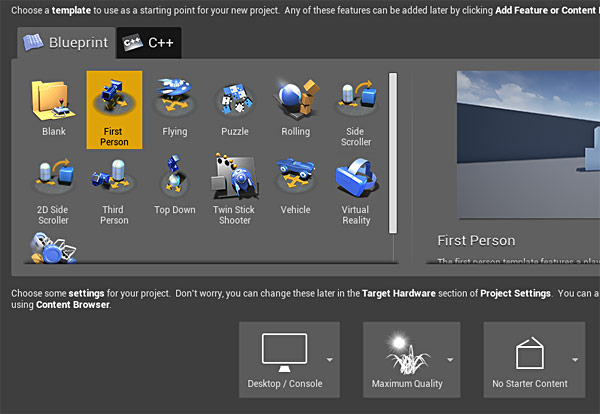
I set the following:
- Choose "Blueprint" or "C++" (Blueprint)
- Choose a "Template" (First Person)
- Choose "Hardware Target" (Desktop/Console)
- Choose "Graphical Level" (Maximum Quality)
- Choose "Additional Content" (No Starter Content)
Set "Folder" location for your project to be stored in. This is going be inside "WoLDTutorials/UE4/" folder, name the project and click "Create Project":

Unreal Engine 4 project folder is now created and all UE4 files will be stored here such as maps/scene, imported assets (Static Meshes, textures, animations), materials, particles, Blueprints etc.
If you need to open an existing UE4 project, go to "Library" and open you project from "My Projects" section:

Textures
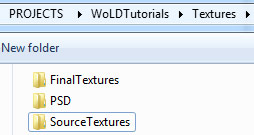
Inside "Textures" folder I create additional sub-folders:
- FinalTextures: will contain final .tga texture files
- PSD: will contain work-in-progress Photoshop files
- Quixel: Quixel Suite related files and projects
- SourceTextures: source textures that you've downloaded, such as textures.com
Create any other additional folders you need.
Reference
Inside "Reference" folder, I create additional sub-folders:
- ConceptArt: will contain concept art (inspiration and art direction of the project)
- PhotoReference: will contain collected image reference of the game environment or prop to be created

Create any other additional folders you need.
Maya LT/Maya Set Up for UE4 Work
Launching Maya LT/Maya for the first time.
Maximize the interface in 3d modeling software by removing UI elements and menus that aren't going to be used for modeling and UV work.
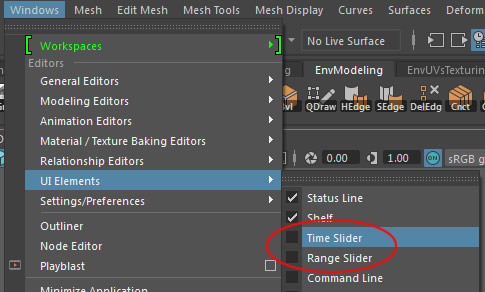
In Maya LT/Maya go to "Window > UI Elements" and disable:
- Time Slider
- Range Slider
Enable "Wireframe on Shaded" in Perspective Viewport:

Enable "Wireframe" (4) in all Orthographic views:

Enable "Display > Heads Up Display > Poly Count" if it isn't showing up already:


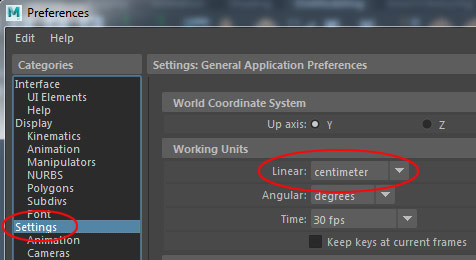
Set up Maya LT/Maya grid spacing to match Unreal Engine 4. Go to "Window > Setting/Preferences > Preferences":

Under "Settings: Working Units > Linear: Centimeter":
Go to "Display > Grid Option":

Under "Size" set the following values to match Maya LT/Maya grid to UE4:
- Length/Width: 1,000 units (size of the gird in perspective viewport; overall grid size and not the size of each grid unit)
- Grid lines every: 10 units (grid unit spacing; this value corresponds to changing the grid size in UE4; use 5, 10, 50, 100 values to match UE4 grid spacing)
- Subdivisions: 1 (set this value to 1 to match UE4)

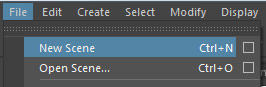
Create new scene, "File > New Scene":
Default character scale/size in UE4 is:
- Height: 180 units
- Width/Depth: 40-60 units
I need a character size reference in the scene to judge proportion and scale. Create a cube with the following dimensions:
- Width: 60
- Depth: 60
- Height: 180

These values are default scale for UE4 character in-game. Modify these values to fit your project and your own in-game character (if you have one).
Modify the pivot point and align the cube to the grid:
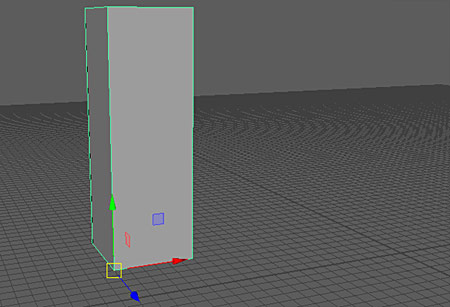
Name the cube "Scale":
![]()
Place it into a Display layer and lock it to "R" so it is un-selectable:

Save the scene "File > Save Scene As" and name it "ScaleTemplate" or anything else you want:
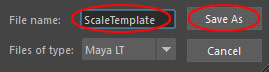
The Maya LT/Maya file will be saved inside "/scenes" folder:

Unreal Engine 4 Set Up
Now let's set up UE4.
In Content Browser (under "Add New" icon) expand "Show/Hide Source Panel". This make it easier to see "Content" folder structure directory:

In Perspective Viewport disable "Real Time" to speed up UE4 and free up some RAM usage:

I like to manually save my work so I disable auto-save, "Edit > Editor Preferences: Loading & Saving" and disable "Auto-Save":
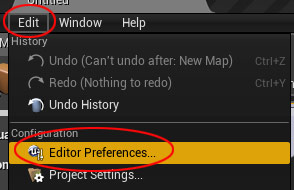

Of course leave this on if you prefer "Auto-Save" feature.
In Content Browser create folders to import your assets into. This will help to keep your content inside UE4 organized.
Right-click inside Content Browser, on "Content" folder and choose "New Folder":

Create the following folders:
- Maps
- StaticMeshes
- Textures
- Materials
- Blueprint

Create any other additional folders you need.
If these folders are empty and you close Unreal Engine 4, they will be automatically deleted. In order for a folder to be saved, you must have imported or created an asset inside that folder.
Create New Level, "File > New Level":

And choose "Empty Level" or "Default". I chose "Default":

Insert a character reference to help you judge size and proportion of your scene. This can be a 3d character model or a BSP brush with dimensions of character in-game.
For BSP Brush:
Go to "Geometry" tab and create "Box" BSP brush with following dimensions and align it to the ground plane:
- Width: 60
- Depth: 60
- Height: 180


For "UE4 Mannequin":
Go to "Library", scroll to the bottom and find "UE4 Mannequin: Mobile". Click "Add To Project":

Choose which Project you want to add "UE4 Mannequin" to and click "Add to Project":

In UE4, insert "UE4 Mannequin: Mobile" into the scene from the Content Browser: "UE4_Mannequin_Mobile/Mesh/SK_Mannequin_Mobile":


If you don't have "UE4 Mannequin: Mobile" then you'll need to download from UE4 Marketplace (free).
Go to "Marketplace":

Search for "UE4 Mannequin":
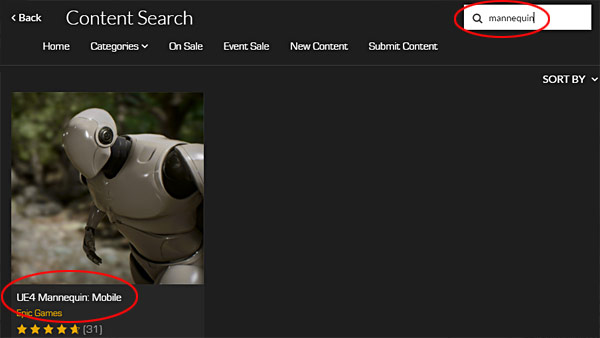
Click on "Free" :

Then in "Library" section, scroll to the bottom and "Add to Project":
Begin Working on Your Project
You are now ready to start modeling Static Meshes, working on your game environment project or importing and testing custom Static Meshes.

SUBSCRIBE & GET FREE UE5 PDF GUIDE
Subscribe to receive NEW/UPDATED and FREE "UE5 Beginner's Quick Start Guide" PDF (90 pages).

Visit this page for more info about the guide...
TOP 5 TUTORIALS TO LEARN UE5
 UE5: How to Download and Install Unreal Engine 5 in 5 Minutes
 UE5: 11 Principles to Learning and Using UE5 as a Complete Beginner
 UE5: Crash Course Quick-Start Guide to Begin Using UE5 - TODAY
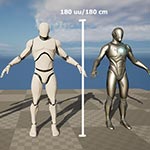 UE5: Complete Guide to Player Scale, Dimensions and Proportions
 UE5: Fundamentals Vol.1 - Essential Beginner's Guide to Getting Started
TUTORIAL CATEGORIES
UE5 FUNDAMENTALS VOL.1 COURSE

UE5: RETRO OFFICE PROJECT

LEARN THE PREPRODUCTION PROCESS

ABOUT WoLD & ALEXG

My name is AlexG. I am self-taught level designer, game environment artist and the creator of World of Level Design.com. I've learned everything I know from personal experimentation and decades of being around various online communities of fellow environment artist and level designers. On World of Level Design you will find tutorials to make you become the best level designer and game environment artist.
Home Terms of Use/Trademarks/Disclaimers Privacy Policy Donate About Contact
All content on this website is copyrighted ©2008-2024 World of Level Design LLC. All rights reserved.
Duplication and distribution is illegal and strictly prohibited.
World of Level Design LLC is an independent company. World of Level Design website, its tutorials and products are not endorsed, sponsored or approved by any mentioned companies on this website in any way. All content is based on my own personal experimentation, experience and opinion. World of Level Design™ and 11 Day Level Design™ are trademarks of AlexG.
Template powered by w3.css