World of Level Design™
Tutorials to Becoming the Best Level Designer and Game Environment Artist (since 2008)
Complete Guide to Exporting/Importing Environment Static Mesh Geometry from Maya into UE5
Category: Maya, UE5
October 19, 2023
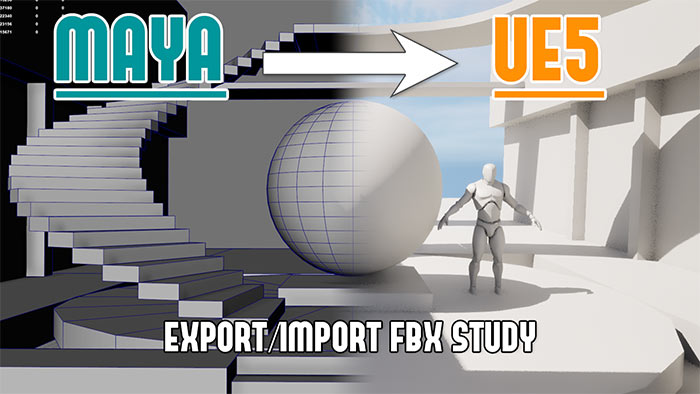
3D models in UE5 are called Static Meshes.
Nearly all environments use Static Meshes to create levels in UE5; this doesn't include things like landscapes, lighting, atmosphere and particles.
How to Create 3D Models/Assets for UE5/UE4
There are two ways to create 3d models for UE5 or UE4:
In this in-depth study guide I'll show you 4 different options for exporting your Static Meshes from Maya and import them into UE5.
4 Ways to Export from Maya to UE5
There are 4 ways to export models from Maya for UE5:
- Selected Mesh (File > Export Selection)
- Entire scene (File > Export All)
- Send to Unreal (File > Send to Unreal)
- Game Exporter (File > Game Exporter)

There are 2 additional ways to work with Maya data in UE5 but they are best used for animation and scene creation/management.
- Using USD (Universal Scene Description)
- Using Live Link (Great for animation)
Matching Grid Size Maya to UE5
Setting the grid up in Maya to match UE5 is very important prior to modeling any prop or environment. This will ensure that everything you create will match 1:1 ration between Maya and UE5.
Maya/UE5: How to Match Grid Size and Dimensions in Maya to UE5 – EXPLAINED
Maya Export Option #1: Selected Mesh as FBX
Choosing File > Export Selection will be the most often used option and will export only selected geometry.
Important steps to make this method work:
- Control the pivot point on the meshes
- Place the object in the World Origin (0,0,0) at its pivot point
- Export (File > Export Selection as FBX)
Step 1: Pivot Point
Control the pivot point on thex object. Place it where you want it. It will be in the same position when imported into UE5.
Press Insert to toggle pivot point modification in Maya or hold D. See this tutorial to modify pivot points in Maya.
Step 2: World Origin
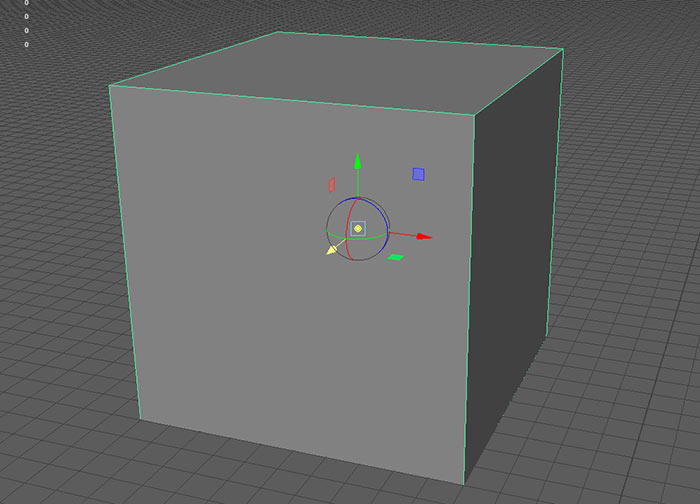
Place the object you are exporting at the World Origin, in (0,0,0) world space at its pivot point.

This is very important. The pivot point will always be moved to World Origin on export, even if the object is somewhere else in the world. So you must manually move the object to the (0,0,0) world space at its pivot point.
Now you can export.
Step 3: Export Options
In Maya, Delete History on the object prior to export to avoid any issues. Select everything and go to Edit > Delete by Type > History.
Also helps to Freeze Transformations so you can always bring this object back to (0,0,0) World Origin to re-export.
Steps to exporting selected Static Mesh geometry from Maya for UE5 (environment assets and props):
- Select the object
- File > Export Selection
- Choose Files of Type to Export > FBX Export
- Enable: Smoothing Groups
- Enable: Smooth Mesh
- Triangulate (optional); I let UE5 triangulate meshes for me on import
- Only check Tangents and Binormals if you have changed these yourself in Maya, otherwise keep it disabled (advanced option)
Everything else is default.

Note: Having Smooth Mesh ON will always export the low-poly version of the mesh when you have Smooth Mesh Preview (3) enabled. Having Smooth Mesh OFF will export whatever view you have enabled in the viewport at the time.
Use one of the latest version of FBX if you have the latest version of UE5. If you get incompatible FBX version upon import, re-export again but use earlier FBX version.
During export you can check under FBX export Information: FBX Plug-In version:

Importing Into UE5 Options
In UE5 Content Browser, inside the Content folder, select where you want to import your Static Meshes:

You can create your own folder inside the Content Browser by Right-Clicking and choosing New Folder:

Select the folder you want to import into and click Add and select Import, then navigate to the exported FBX files:

Or Left-Click and drag the exported FBX Static Mesh into any Content Browser folder:

FBX Import Options window will open. Enable Show All Advanced Detail:

Few important options to know about:
- Build Nanite: builds Nanite version of the Static Mesh
- Auto Generate Collision: will auto-generate collisions on your Static Meshes so the player can't walk through them
- Generate Lightmap UV's: will create a second UV channel for lightmaps (if no lightmap UVs were created in Maya). If you are using Lumen lighting, you don't need lightmaps
- Combine Meshes: do you want to combine meshes on import or keep meshes separated (depends on how the Static Meshes in Maya were exported)
- Import Materials: will create a default Material and assign it to your Static Mesh
- Import Textures: will import textures if you had them created and assigned in Maya
Everything else should be kept default.
Settings I Use:
- Build Nanite: enabled (works best with Lumen even if you're using low-poly meshes)
- Auto Generate Collision: enabled
- Generate Lightmap UV's: disabled
- Combine Meshes: depends on the exported mesh
- Import Materials: disabled
- Import Textures: disabled
Maya Export Option #2: Export All as FBX
Choosing File > Export All will export the entire Maya scene into an FBX file.
Great Option to Use For:
- Large scenes you create entirely in Maya and only want to light in UE5
- Disable Combine Meshes upon import
- All meshes are kept as separate objects
- Quickly Generate Missing Collisions on import into UE5
- The Maya scene is quickly constructed in UE5 by dragging all meshes into the UE5 scene
- You can input 0,0,0 in the Location Transform in UE5 for any mesh and place that mesh exactly where it was in Maya
Great export option for large scenes. Where you are creating the entire scene in Maya and want to quickly bring it into UE5 without having to construct it again.
You can drag all the Static Meshes from the Content Browser and the entire scene will be recreated in UE5:


Important part of this option is disabling Combine Meshes on import into UE5 so all meshes in the scene are kept as separate objects:

The downside to this option is all objects will have their pivot point in the World Origin:

It's not the method you should use if you are going to construct more of the environment in UE5.
If you are going to expand to create larger environment, use Export Selection instead and export individual meshes.
For each mesh, the pivot point will be in World Origin (0,0,0). You can type in 0,0,0 in the Location Transform in UE5 and place that mesh exactly where it was in Maya:

Quickly Generate Missing Collisions on imported meshes and you can have a playable environment right away. As long as you didn't use Combine Meshes on import.
You should combine certain meshes in Maya so they are treated as a single mesh upon import in UE5, such as stairs for example.
As long as you maintain the same names for objects in Maya and for exported FBX file, you can re-export and re-import very quickly.
- The name of the Static Mesh is: NameOfExportedFile_NameOfMeshInMaya
- You can drag all the Static Meshes into the scene and they will be arranged into your environment, just don'e move anything; and it'll be difficult to since pivot position is not ideal
Downsides of This Method:
- Don't Combine Meshes on import, the scene will be one single Static Mesh and automatically generated collisions will not work
- Lumen doesn't like large meshes and will have problems lighting them correctly
- All duplicated meshes that should be modular such as columns will be imported as their own individual mesh
If you decide to enable Combine Meshes upon import into UE5, the entire scene will be treated as a single Static Mesh. Probably not something you want. And if you also Generated Missing Collisions then you won't be able to walk around the environment as it is usually a big bounding box of simple collision.

You can fix this problem by using Complex Collision as Simple (this is expensive to use but works if it's not a playable environment):

Export Options
In Maya, Delete History on all the objects in the scene to avoid any issues. Select everything and go to Edit > Delete by Type > History.
Steps for Export All:
- File > Export All
- Choose Files of Type to Export > FBX Export
- Enable: Smoothing Groups
- Enable: Smooth Mesh
Everything else is default.
Import Options
In UE5 Content Browser, inside the Content folder, select where you want to import your Static Meshes. Left-Click and drag the exported FBX file into Content Browser folder.

Choose the following options:
- Build Nanite: builds Nanite version of the Static Meshes
- Auto Generate Collision: will auto-generate collisions on your Static Meshes so the player can't walk through them
- Generate Lightmap UV's: disable if using Lumen lighting; this will create a second UV channel used for lightmaps (if no lightmap UVs were created in Maya)
- Combine Meshes: disable this, as you don't want this scene to be one single Static Mesh
- Import Materials: disable; this will create a default Material and assign it to all Static Meshes
- Import Textures: disable this; this will import textures if you had them created and assigned in Maya
Everything else should be kept default.
Maya Export Option #3: Send to Unreal
Choosing File > Send to Unreal will export the entire scene or selected meshes into an FBX file and place it into specified UE5 project directory.
Before using Sent to Unreal option; you will need to set a project folder where the exported objects will go into.
Setting UE5 Project to Use Send to Unreal
- File > Send to Unreal > Set Unreal Project
- Select a valid Unreal project folder to import all objects into
- Must be within an existing Unreal Project folder where the .uproject file is kept
You can now use File > Send to Unreal option. You can either export Selection or All objects within the scene:

- Send to Unreal > Selection: exports only the selected mesh
- Send to Unreal > All: exports the entire scene
Upon export, Maya will place all exported FBX files into Import folder inside the UE5 project directory:

Send to Unreal keeps things more organized and you will always know where the exported FBX files were placed.
You still have to import all exported Static Meshes into UE5 manually like in previous options.
Export Options
In Maya, Delete History on any objects you are about to export to avoid any issues. Select everything and go to Edit > Delete by Type > History.
- File > Send to Unreal and choose Selection or All
- Choose Files of Type to Export > FBX Export
- Enable: Smoothing Groups
- Enable: Smooth Mesh
- Only check Tangents and Binormals if you have changed these yourself in Maya, otherwise keep it disabled (advanced option)
Everything else is default.
Import Options
In UE5 Content Browser, inside the Content folder, select where you want to import your Static Meshes.
Navigate to UE5 Project directory and into Import folder. Left-Click and drag the exported FBX file into Content Browser folder.

Choose the following options:
- Build Nanite: builds Nanite version of the Static Meshes
- Auto Generate Collision: will auto-generate collisions on your Static Meshes so the player can't walk through them
- Generate Lightmap UV's: disable if using Lumen lighting; this will create a second UV channel used for lightmaps (if no lightmap UVs were created in Maya)
- Combine Meshes: choose if you want to Combine imported meshes into a single Static Mesh or keep them all separate on import
- Import Materials: choose if you want to create and assign a quick default material; this will create a default Material and assign it to all Static Meshes
- Import Textures: if you disable Import Material then choose if you want to import textures; you would need to have assigned these textures to the objects in Maya - disable otherwise
Everything else should be kept default.
Maya Export Option #4: Game Exporter
Game Exporter is a great way to export a large number of Static Meshes from Maya, place them at the world origin, at their pivot points automatically. Perfect a large amount of modular assets or props being exported at the same time.
See this post for all detailed notes: In-Depth Overview: How to Batch Export Using Maya Game Exporter for UE5/UE4.
Export Static Meshes to Have Mutliple Material ID Slots in UE5
There will be times when you'll need to have multiple materials applied to the same Static Mesh. You will see multiple ID slots inside UE5 to assign those materials:

This setup is first done in Maya:
- Step 1: Create different Materials in Maya and assign them to the asset (such as Lambert1, Lambert2).
- Step 2: Assign these materials to different parts of the mesh at object level or at component (faces) level.
There are two options of assigning Materials in Maya:
- Option #1: Assign the Materials to separate geometry that make up that Static Mesh then combine all the meshes into one Static Mesh using Mesh > Combine prior to export. Each different Material will get its own Material property in UE5.
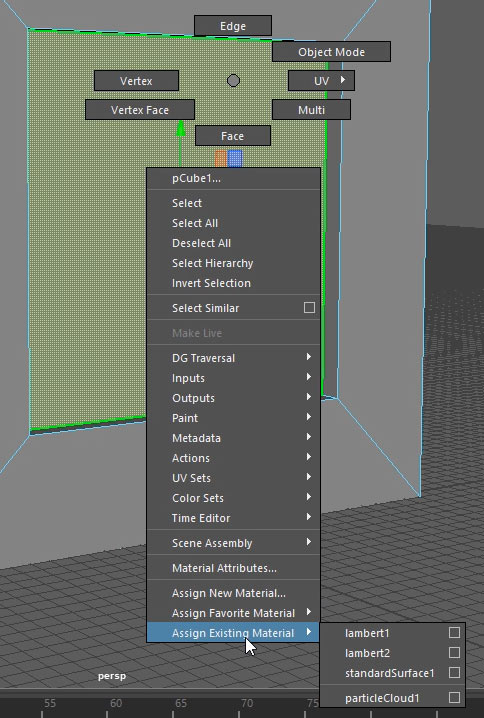
- Option #2: If you already have the objects combined into one Static Mesh in Maya, you can apply materials on selected faces at component level. Select the faces then Right-Click and choose Assign an Existing Material.
Applying a Material on faces example:
When you import the Static Mesh into UE5, you will have multiple Material slots to assign onto the mesh:
Two ways to assign Materials in UE5 on Static Meshes:
- Inside the Static Mesh Editor: will apply to all instances of this Static Mesh being used in all levels
- In Details panel once the Static Mesh is placed your level: will apply only to the selected Static Mesh that is already in your map
Maya Foundation: Modeling Home-Study Course
Learn Maya UVing completely from the start so you can begin texturing your models in this Maya Home-Study Course...
Home Terms of Use/Trademarks/Disclaimers Privacy Policy Donate About Contact
All content on this website is copyrighted ©2008-2024 World of Level Design LLC. All rights reserved.
Duplication and distribution is illegal and strictly prohibited.
World of Level Design LLC is an independent company. World of Level Design website, its tutorials and products are not endorsed, sponsored or approved by any mentioned companies on this website in any way. All content is based on my own personal experimentation, experience and opinion. World of Level Design™ and 11 Day Level Design™ are trademarks of AlexG.
Template powered by w3.css

 Modular Environment Design Masterclass Tutorial Course
 Maya Foundation: Home-Study Course - Model and UV Environments
 Substance 3D Painter Essentials - Master Texturing
 UE5: Fundamentals Vol.1 - Create with Unreal Engine 5
 UE5: Retro Office Project - Create Beautiful Interior Env
 UE5: Master Material Creation - Create Master Materials in UE5
 Preproduction Blueprint: Plan Environments and Level Designs

