World of Level Design™
Tutorials to Becoming the Best Level Designer and Game Environment Artist (since 2008)
CS:GO SDK How to Create Your First Room - BSP Brush Geometry
Category: Source: CSGO SDK
February 07, 2013
Complete tutorial focusing on bsp brush geometry for beginners in CS:GO SDK.
A lot of key concepts covered in this tutorial. Creating your first room. Expand to second room and add hallways. Using developer textures and how to avoid having compile error leaks. Using player reference model for scale and why you shouldn't use make hollow feature.
In this tutorial you will learn:
- 3 things you need in order to run your map in-game
- How to create your first room
- How to create your second room
- How to add hallways and connect two rooms
- What is hollow bsp brush option and why you shouldn't use it
- Complete overview of bsp brush geometry creation for beginners

BSP BASICS OVERVIEW
3 things you need in order to run any map in CS:GO:
- BSP Geometry (closed off from black void)
- Light
- Player Spawn/Start

SAVING YOUR MAP FILE
Before we start,we shouldsave.
File --> Save As

Your map will be saved as.vmf file inside SDK Content / Maps folder.
VMF = Valve Map Format
VMF are working map files in Hammer Source. Once you compile your map, it becomes .bsp file.
CREATING YOUR FIRST ROOM
First lets set ourtexture. When you create bsp brush geometry, the editor will use the defaultcurrent texture.
Click on Browse button, inlower rightcorner of the editor.

Texture Browser will pop up, in Filter option type dev.

Choose the orange developer texture with the character height reference.
You can use any other developer texture you want.
Reason we are using developer texture for our textures to start with is we want to keep our environment very simple as we are blocking in our world. You don't want to start texturing or worry about surface materials of your map this early.
Another reason is developer textures help you to keep your map to scale.
Full texturing tutorial here Applying Textures.

We are now ready to begin creating bsp brushes to define our walls, floor and ceiling.
Use Block Tool to do this.

In side, top or front view, draw out brush template by left click and drag. This will create a bsp brush template.
Start with the floor. I created bsp template using top view:


Press enter to create geometry brush. For the floor I used gray grid developer texture.

PLACE PLAYER SCALE REFERENCE
At this point we want to place reference player model. We can get a more accurate judgmentof proportion and scale of our map.
This is the same technique for inserting player spawns, but we will be using this only as a reference scale model right now.
Click on the Entity Tool.

On right hand side, use the drop down menu and select info_player_counterterrorist or info_player_terrorist.

Left click in perspective viewport to place the model.

RESIZING AND DUPLICATING YOUR BRUSHES
At this point we have the basic elements to begin quickly blocking in our walls and ceiling. Then expand into second room and hallways.
Instead of drawing out the template brushes again. We can use the floor brush already created then duplicate it and resize the brush for the rest of the walls.
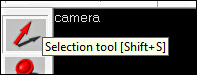
Click on Selection Tool, in order to be able to select brushes and entities.
Select the floor brush by left clicking on it.

In side or front viewport:
- Hold Shift + Left Click Hold and Drag to Duplicate the Brush

If you need to select multiple brushes in order to duplicate.
To add to a selection: select the first brush, then hold Ctrl and click on any additional brushes, to add to a selection.
To remove from the selection: click on already selected brush. It will remove it from theselection.
You can resize this brush using now, using top, side and front views to create your walls.

If you want to re-texture the brushes, see this tutorial on Applying Textures.
MAKE HOLLOW TOOL
There is a tool in Hammer called Make Hollow. This option allows you to create a big block of geometry and then hollow out the interior. Creating a room very quickly.
I personally do not like using Make Hollow option. It is not very flexible or intuitive to use. I prefer to create all walls, floors and ceiling manually, as in the steps above.
But, if you ever need to use it, here are the steps to do it.
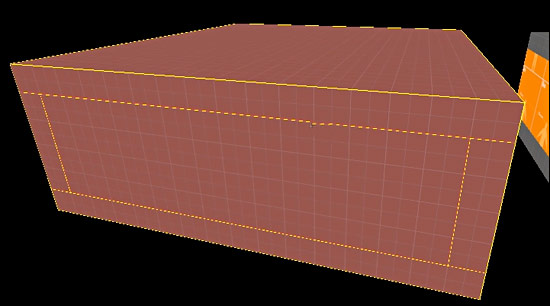
Create a large brush that is the size of the room. For example something like 512x512 in width and depth and 128 in height.
Select the brush.
Go to Tools --> Make Hollow

16 or 32 are good values to hollow out.

This will carve out the interior of the room by giving 16 or 32 unit walls. The brushes of the room will be grouped. So if you need to ungroup them and resize them, select the hollowed out room go to Tools --> Ungroup or press Ctrl+U.
CREATING HALLWAYS, CONNECTING TWO ROOMS
In order to expand to the second room and add hallways you will need to begin duplicating already created brushes and creating the second room.
This has to be done brush by brush, one at a time. Duplicating and resizing the brushes.

Moving them over, resizing and defining the walls, hallways, doorways and ceiling.

Important: Make sure that you do not leave any gaps between the interior of the room and the black outside void. Your entire environment has to be enclosed within the bsp brushes and never exposing itself to the exterior black void.
CS:GO SDK Beginner Basics Series:
How to Download, Install, Launch Hammer World Editor
Level Editor Navigation and Interface Basics in 15 minutes
Player and Architecture Scale, Dimension and Proportion
BSP Brush Geometry: How to Create Your First Room
Adding Prop Models: Using Models In Your Map
Adding Lights: How to Light Your First Room (Lighting Basics)
Texturing: Applying Textures and Principles for Optimizing Early

SUBSCRIBE & GET FREE UE5 PDF GUIDE
Subscribe to receive NEW/UPDATED and FREE "UE5 Beginner's Quick Start Guide" PDF (90 pages).

Visit this page for more info about the guide...
TOP 7 TUTORIAL COURSES FOR 2026
 Modular Environment Design Masterclass Tutorial Course
 Maya Foundation: Home-Study Course - Model and UV Environments
 Substance 3D Painter Essentials - Master Texturing
 UE5: Fundamentals Vol.1 - Create with Unreal Engine 5
 UE5: Retro Office Project - Create Beautiful Interior Env
 UE5: Master Material Creation - Create Master Materials in UE5
 Preproduction Blueprint: Plan Environments and Level Designs
TUTORIAL CATEGORIES
MODULAR ENVIRONMENTS MASTERCLASS

UE5: RETRO OFFICE PROJECT

MAYA FOUNDATION COURSE

SUBSTANCE PAINTER ESSENTIALS

LEARN THE PREPRODUCTION PROCESS

ABOUT WoLD & ALEXG

My name is AlexG. I am self-taught level designer, game environment artist and the creator of World of Level Design.com. I've learned everything I know from personal experimentation and decades of being around various online communities of fellow environment artist and level designers. On World of Level Design you will find tutorials to make you become the best level designer and game environment artist.
Home Terms of Use/Trademarks/Disclaimers Privacy Policy Donate About Contact
All content on this website is copyrighted ©2008-2024 World of Level Design LLC. All rights reserved.
Duplication and distribution is illegal and strictly prohibited.
World of Level Design LLC is an independent company. World of Level Design website, its tutorials and products are not endorsed, sponsored or approved by any mentioned companies on this website in any way. All content is based on my own personal experimentation, experience and opinion. World of Level Design™ and 11 Day Level Design™ are trademarks of AlexG.
Template powered by w3.css