World of Level Design™
Tutorials to Becoming the Best Level Designer and Game Environment Artist (since 2008)
When I'm starting a new scene whether it's a playable level or stand-alone game environment, last thing I am concerned about is lighting.
Lighting comes at a later stage in level design and game environment art process when the scene is already created.
In the beginning I am focused on creating geometry - using BSP brushes, inserting Static Meshes, working with landscape, implementing gameplay and creating/testing Blueprints.

For this I need a basic daytime scene with even lighting.
"Default Level" under "File > New Level" is a good start. Many use it as-is without changes. The scene comes with some light actors, sky sphere, fog, player start and a ground plane.
But there are some issues - distracting auto-exposure, shadows are too dark and it is hard to judge scale of the environment.
You just need to tweak this "Default Level" a bit to make it construction friendly.
Here is my 8-Step Checklist for default level that I use to begin creating environments and playable levels in.
Step 1: Default Level
Go to "File > New Level":

And choose "Default Level":
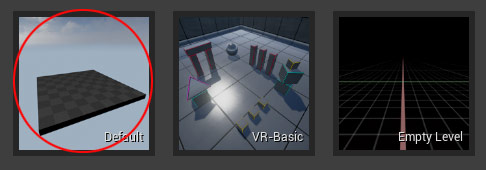
This level gives you Sky Sphere, Directional Light, Atmospheric Fog, Reflection Capture, Sky Light, Player Start and Ground Plane.
With "Default Level" started, let's tweak few actors.
Step 2: Directional Light
Select "Directional Light" and make sure "Intensity" is set to "3.14":

3.14 is a good base value to set your Directional Light for daytime lighting. Higher values may cause your PBR textures be too bright due to light's high intensity.
Step 3: Update SkyLight
By default "SkyLight" is set to "Static" and with this you would need to build lighting to see changes. Instead change "SkyLight" mobility to "Stationary":
![]()
Increase "SkyLight" intensity if you need to add more light into indirectly lit areas (into shadows):

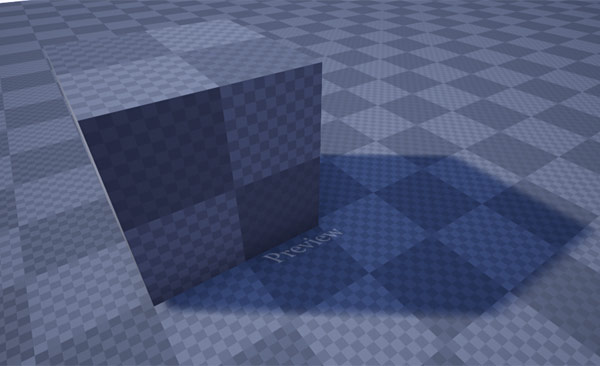
Use "SLS Captured Scene" which uses the "Sky Sphere" material to reflect lighting back into your scene:

If you have interior environments use temporary "Point Lights" or "Spot Lights":

Alternatively you can change the "Sky Light" to "Source Type: SLS Specified Cubemap" and use an HDR image under "Cubemap":

Step 4: Expand Ground Plane
Duplicate the ground plane Static Mesh for more room to work in:
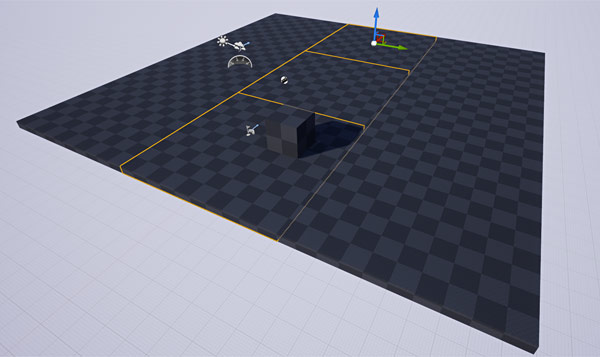
- Alt + Left Mouse Click and Drag = Duplicate Selected Object
Of course you can use a landscape, your own custom ground plane or BSP brushes.
Step 5: Insert Mannequin for Scale Reference
I use "UE4 Mannequin Mobile" from UE4 Marketplace as human reference scale guide to judge architecture and proportion of the environment.
You can download the "UE4 Mannequin Mobile" and use it in any project by getting it from UE4 Marketplace. Here is a quick tutorial on how to do that:
Once you added "UE4 Mannequin Mobile" to your project, insert it into the level:

Step 6: Post Process Volume
Exposure or Eye Adaptation is how your eyes naturally adjust when you walk from bright into dark environments or from dark into bright environments. In UE4 this happens automatically in all levels unless you control its effect.
Exposure (Eye Adaptation) adjustments are distracting in the beginning stages of environment creation. Disable Exposure through Post-Process Volume.
Insert Post Process Volume:

Enable "Infinite Extent (Unbound)":
![]()
"Infinite Extent (Unbound)" makes Post Process Volume universal, meaning it will affect the entire level without you having to be inside this volume.
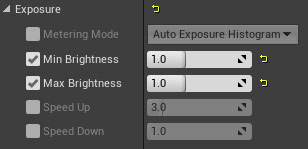
Under "Lens: Exposure" set "Min/Max Brightness to 1":
- Min Brightness: 1
- Max Brightness: 1
Step 7: Lightmass Importance Volume
Lightmass Importance Volume tells Unreal Engine where areas to focus its lighting calculations. If you have a large level but only a small part of it where the player will be, define this area with Lightmass Importance Volume.
Under Volumes, insert Lightmass Importance Volume into your level:

Scale the volume or use Geometry Editing mode by pressing Shift+5:
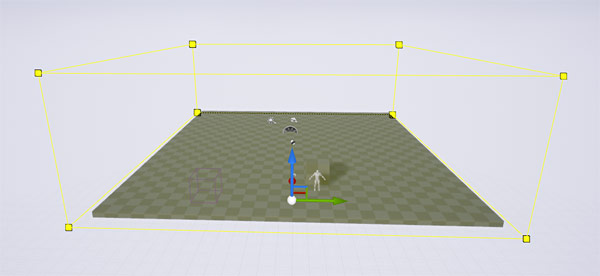
Surround important (playable) areas of your level inside this volume. In the beginning it will probably be just a small section.
Step 8: Sky Sphere Blueprint
Default "BP_Sky_Sphere" comes with ability to change the sky material based on "Directional Light" angle. Although you won't see these updates in real time.
Change the angle of the Directional Light":
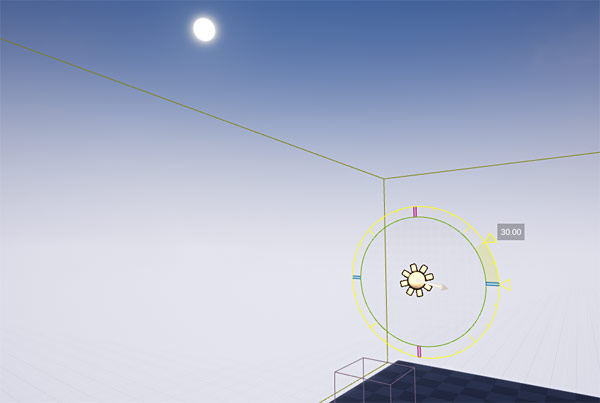
Select "BP_Sky_Sphere" and click on "Refresh Material":
![]()
The Sky will now be updated:

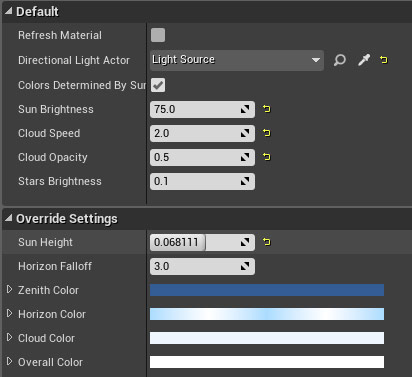
There are additional controls for "BP_Sky_Sphere" in the "Details Panel, such as Sky Colors and Clouds:
Save The map and You are Now Ready
Save the map. Go to "File > Save Scene As":
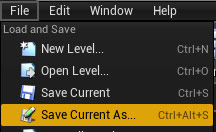
I saved mine as "MyStarterMap":

You are now ready to begin working on your level, blocking in with BSP brushes, and constructing your environment and importing and testing your Static meshes.
Next Recommended Tutorials:
UE4: Night Time Lighting - Starry Sky (Static/Baked Lighting) with BP_Sky_Sphere Part 1/2
UE4: Night Time Lighting - Moon Sky (Static/Baked Lighting) with BP_Sky_Sphere Part 2/2
Home Terms of Use/Trademarks/Disclaimers Privacy Policy Donate About Contact
All content on this website is copyrighted ©2008-2024 World of Level Design LLC. All rights reserved.
Duplication and distribution is illegal and strictly prohibited.
World of Level Design LLC is an independent company. World of Level Design website, its tutorials and products are not endorsed, sponsored or approved by any mentioned companies on this website in any way. All content is based on my own personal experimentation, experience and opinion. World of Level Design™ and 11 Day Level Design™ are trademarks of AlexG.
Template powered by w3.css


 Maya Foundation: Home-Study Course - Model and UV Environments
 Substance 3D Painter Essentials - Master Texturing
 UE5: Fundamentals Vol.1 - Create with Unreal Engine 5
 UE5: Retro Office Project - Create Beautiful Interior Env
 UE5: Master Material Creation - Create Master Materials in UE5


