World of Level Design™
Tutorials to Becoming the Best Level Designer and Game Environment Artist (since 2008)
UE4: Create Procedural Landscape Heightmaps Entirely in Photoshop for UE4
Category: UE4
May 19, 2020

Did you know you could use Photoshop to create heightmaps for UE4?
All you need is the Clouds filter.
But before you run this filter there are a few things you need to know to make this heightmap work for UE4.
I did the work. I ran the tests.
Here is how you can use Photoshop and Clouds filter to achieve damn good results to create massive landscapes in UE4.
Video Tutorial
Photoshop: Basic Heightmap Steps
Create new document in Photoshop, File > New. Set the size of the Heightmap use the following settings:
- Width/Height: 2017x2017
- Grayscale
- 16bit
- Resolution 72

2017x2017 size will define the dimensions of the landscape. I recommend to use Epic's Recommended Landscape Chart that I explained in this tutorial.
Set foreground color to black and background to white or vice versa. Shortcut is D = Set Default Foreground and Background Color.

Run the clouds filter, Filter > Render > Clouds:

You can run the Clouds filter again for different pattern. Shortcut is Ctrl + F = Repeat Last Used Filter. Here are the results.
Remember:
- Black = Low, Valleys
- White = High, Peaks
Exporting Heightmaps from Photoshop
Save the heightmap using the following settings:
- 16-bit
- PNG or RAW
Importing Heightmaps into UE4
In UE4, switch to Landscape Mode (Shift + 3 in UE4.24 and earlier; Shift + 2 in UE4.25+) and choose to Import from File:

Navigate to the saved heightmap and open it. The properties such as Section Size, Components and Resolution will be filled in to what UE4 thinks is best. If you know what you are doing then you can change these, otherwise leave them as is:

Then click Import.
UE4: Adjust Scale Z
Cloud filter without any adjustment will produce full heightmap variation using the entire black to white value range. The height will be very intense so you need to lower Scale Z on the landscape.

Select the landscape and go to Details panel. Lower Scale Z value. Make sure you have the icon unlocked:


Photoshop: Difference Clouds
Try different heightmap effect by generating Difference Clouds.
Go to Filter > Difference Clouds. You must have Clouds filter applied at least once before you run Difference Clouds.
Here are Difference Clouds in Photoshop:

Result in UE4:

Photoshop: Best Heightmap Results
Photoshop Clouds filter by itself has a problem. It gives you the full range of black to white values and this is why you must lower the Scale Z. Here is how to fix this and create a better effect that will give you a more natural and realistic results.
Create a New Layer and fill the layer with medium gray.
- Medium Gray Value = RGB at 149 or #959595
- Alt + Backspace = Fill Layer with Foreground Color
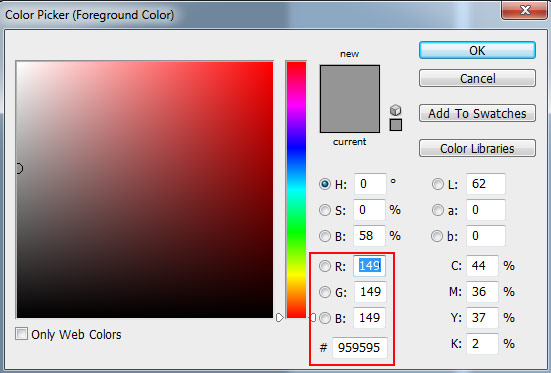

This gray color is the medium point of the heightmap in UE4.
Then create a new layer again and run Filter > Clouds (Black and White). Change the Blend Mode to Lighten and lower the Opacity:


You should also change Scale Z back to 100 because now we are using correct heightmap values. This alone will produce very good results BUT will give you flat areas on your terrain:
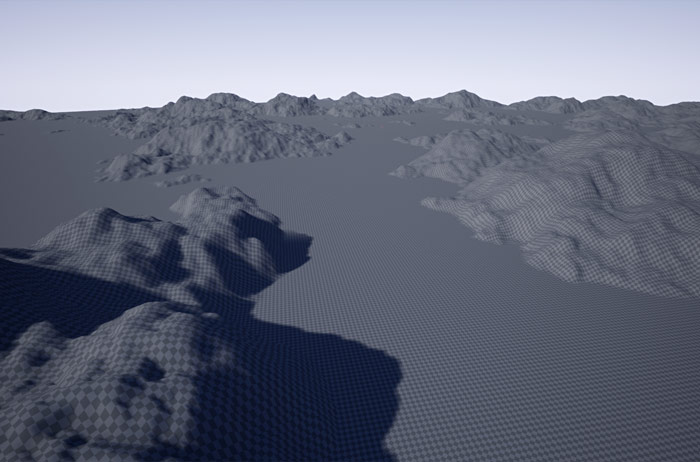
Let's take this further.
Duplicate the Cloud Layer and press Ctrl + I to invert it. Change the Blend Mode of this duplicated layer to Multiply and lower its Opacity even more:

Export it and import it into UE4:

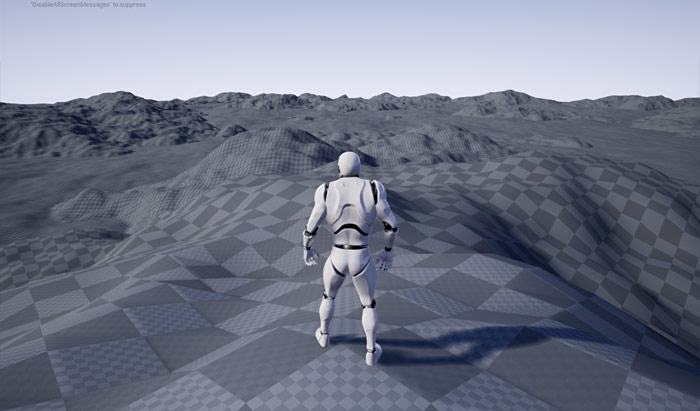
You could play around with different Layer Blends and Opacity settings for each of the two layers to get interesting effects.
Photoshop: Gaussian Blur Filter
The Clouds filter can generate a lot of noise on your landscape. You can fix it by running Gaussian Blur.
Press Ctrl + A to select the entire working canvas and press Ctrl + Shift + C to copy all visible, the press Ctrl + V to paste. This will create a new layer with what you see on screen and place everything visible onto its own layer. This way you can make changes to this layer and not destroy the work you've done.
- Ctrl + A = Select All
- Ctrl + Shift + C = Copy All Visible
- Ctrl + V = Paste
Run a Filter > Blur > Gaussian Blur filter on the image. Use low setting like 1. Too much blur will smooth your landscape and remove detail.
UE4 Import/Reimport Heightmap Tip
Quickly reimport your heightmap by going to Landscape Mode (Shift + 3 in 4.24 or earlier and Shift + 2 in 4.25+). Right Click on the Heightmap and choose to Reimport:

If you don't see the Reimport option then you need to Import from File once and the option to Reimport will appear after that. Make sure the resolution matches to the heightmap created in Photoshop.
Manually Paint In The Height
You could also paint the height in, manually. Create a new layer so you don't paint on the heightmap and use any of the gray colors to paint paths or terrain modifications:


Here are the results in UE4:
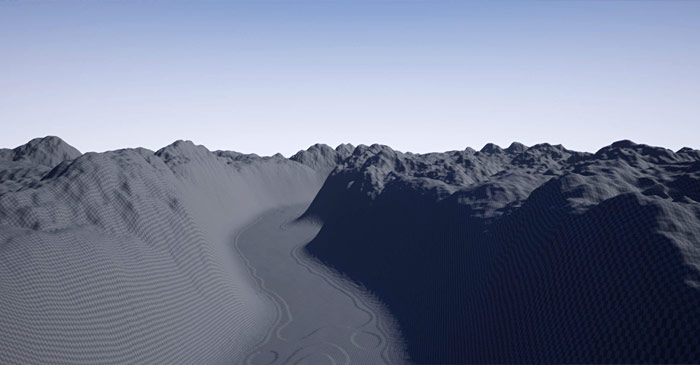
Downside to this Method
Downside to this method is it's a procedural noise generator and it doesn't reflect terrain from the real world. However it can pass for real world landscape if you follow this tutorial.
Next Tutorial
UE4: Secrets to Generating Real-World Heightmaps from Terrain.Party for UE4
Download "UE4 Landscape Essentials" Course
Learn EVERYTHING you need to know for how to create/sculpt landscapes and create/paint landscape materials entirely in UE4 without any external software with "UE4 Fundamentals Vol.2: Landscape Essentials".
Home Terms of Use/Trademarks/Disclaimers Privacy Policy Donate About Contact
All content on this website is copyrighted ©2008-2024 World of Level Design LLC. All rights reserved.
Duplication and distribution is illegal and strictly prohibited.
World of Level Design LLC is an independent company. World of Level Design website, its tutorials and products are not endorsed, sponsored or approved by any mentioned companies on this website in any way. All content is based on my own personal experimentation, experience and opinion. World of Level Design™ and 11 Day Level Design™ are trademarks of AlexG.
Template powered by w3.css


 Modular Environment Design Masterclass Tutorial Course
 Maya Foundation: Home-Study Course - Model and UV Environments
 Substance 3D Painter Essentials - Master Texturing
 UE5: Fundamentals Vol.1 - Create with Unreal Engine 5
 UE5: Retro Office Project - Create Beautiful Interior Env
 UE5: Master Material Creation - Create Master Materials in UE5
 Preproduction Blueprint: Plan Environments and Level Designs


