World of Level Design™
Tutorials to Becoming the Best Level Designer and Game Environment Artist (since 2008)
UE4: Night Time Lighting - Moon Sky (Static/Baked Lighting) with BP_Sky_Sphere Part 2/2
Category: UE4
February 06, 2018

How to light night time outdoor scene with a "moon sky" in Unreal Engine 4?
Each night time lighting situation is different. How you light any night time or day time scene comes down to artistic direction and emotional intention.
In the first part of this series we covered starry sky lighting that has a different feel and look than a moon sky lighting which is what we'll cover in this second tutorial.
2 tutorials in this series are:
- Tutorial #1: Night Time Lighting - Stars Sky
- Tutorial #2: Night Time Lighting - Moon Sky (current tutorial)
In This Tutorial You Will Learn
Here is what you can expect to learn from the following tutorial:
- Lighting night time outdoor scene with a moon sky without any custom sky content
- How to manually insert "BP_Sky_Sphere", "Directional Light" and "Atmospheric Fog" and link them all to work together
- How to change sky colors to light for night time moon lighting
- How to use a "Sky Light" to light for night time
- Properly expose for night time with "Auto Exposure" in "Post Process Volume"
- Changing "Environment Color" to add a constant overall color to the scene
- Using "Exponential Height Fog" and "Volumetric Fog" to create more believable night time scene
- How to change the environment colors after you are done lighting with an LUT (Color LookUpTable) texture
- LUT textures will eventually become obsolete - what to do about it and how to use properly calibrated Color Grading options in Post Process instead
Video Tutorial
Overview
Let's do a quick overview.
Make sure you have followed the first tutorial as we cover some of the concepts in more detail.
Lighting night time outdoor scenes in Unreal Engine 4 we'll need a Sky Sphere (aka: sky dome or skybox), Sky Light, Directional Light (if you have a moon in the sky), sky material, atmosphere (fog) and artificial lights (Spot Lights and/or Point Lights).
We will be using "BP_Sky_Sphere" that comes with Unreal Engine 4 and we will tweak it to get what we want. "BP_Sky_Sphere" is a Blueprint Sky set up that contains certain amount of customization right out of the box. This includes:
- Static Mesh sky
- Sky material
- Sun disk in the sky based on rotation of the "Directional Light"
- Sky color changes based on the angle of the "Directional Light"
- Ability to change "Cloud Speed" and "Cloud Opacity"
- Way to increase "Star Brightness" for night time sky
The way Blueprint Sky is set up we have some limitations. For example we can't have moon and stars at the same time, we can't change the size of the moon or how the moon looks.
Night Time Lighting #2 - Moon Sky
We'll be using "Directional Light" to light our scene with a very low intensity to mimic lighting from the moon.
We'll use the "BP_Sky_Sphere" sun disk as our moon in the sky.
In addition to the "Directional Light", we'll use a "Spot Light" and a "Sky Light".
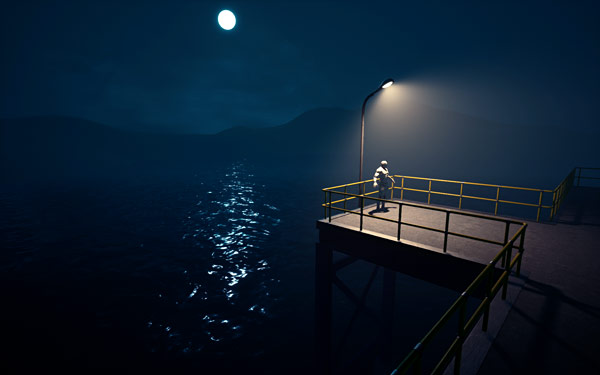
Here is the result we are after:

Example Scene
I have an environment already built inside an empty level. It contains Static Meshes, ocean water that comes with Starter Content, very simple landscape, Lightmass Importance Volume, Player Start and Sphere Reflection Capture.
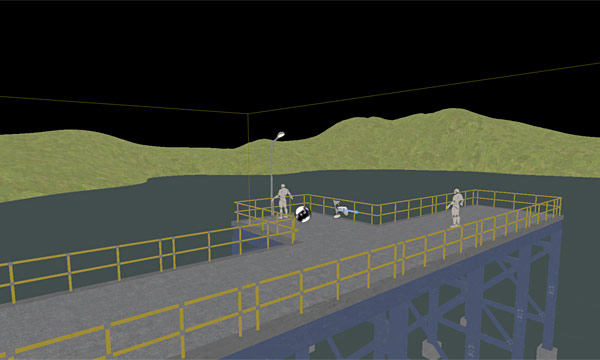
The scene has no sky sphere and no lighting.
If you don't have an existing scene to use, then go to "File > New Level":

Choose "Empty Level":

Blueprint Sky Sphere Option #2
In the first tutorial, we used the "Default Level" to access "BP_Sky_Sphere". In this tutorial we'll insert the "BP_Sky_Sphere" into our scene along with all the light actors. This way you understand how "Directional Light" works with the sky.
In "Content Browser" enable "View Options > Show Engine Content":
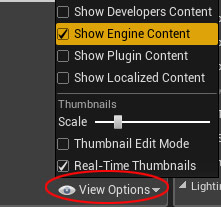
Select "Engine Content" folder and search for "Sky Sphere":

Insert "BP_Sky_Sphere" into the map:

Directional Light
Insert a "Directional Light":

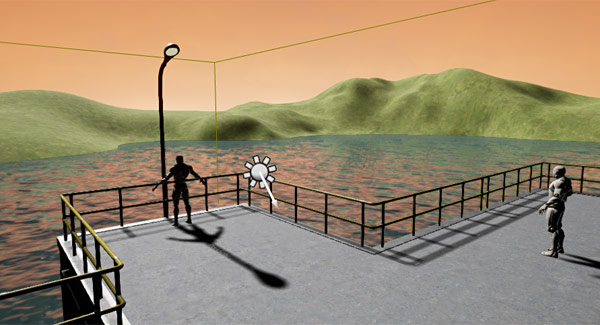
We now need to connect the "Directional Light" and "BP_Sky_Sphere" to work together.
Select "BP_Sky_Sphere" and under "Directional Light Actor" drop-down menu, choose "Directional Light":

Rotate the angle of the "Directional Light" to whatever you like, this will determine the moon lighting position:

You won't see any changes in the sky sphere because you need to select "BP_Sky_Sphere" and click on "Refresh Material":
![]()
We now have our "BP_Sky_Sphere" and "Directional Light" connected to work together. You will see the sun disk appear in the sky and based on the angle of the "Directional Light", sky color will change:

Changing Sky Colors
The sky is automatically changing to a time of day depending on the angle of the "Directional Light". This may work for most scenes but we want night time sky. We can't make the "Directional Light" point up as we did in star sky because we want to keep the sun disk, which we'll use as our moon.
We need to change Zenith, Horizon, Cloud and Overall colors of the sky.
Select the sky and disable "Colors Determined by Sun Position":
![]()
Doing this will enable to adjust the following 4 properties. Choose the colors that you want your sky to be:
- Zenith Color: color is when you are looking up (I used "Hex sRGB: 000F0FFF")
- Horizon Color: color when you are looking straight and below the horizon (I used "Hex sRGB: 000F0DFF")
- Cloud Color: cloud color (I used "Hex sRGB: 16181AFF")
- Overall Color: acts like opacity for the sky; if black(invisible)/white (visible) values are used; otherwise if you add color it will set overall color for the sky (I used "Hex sRGB: AEFCFCFF")

Here is what we have so far:
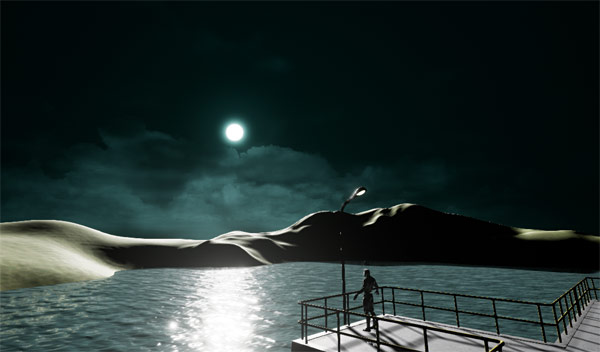
Directional Light Color and Intensity
The light is too strong.
Select the "Directional Light" and change "Intensity" and "Light Color" to fit the art direction and the emotional feeling you want to communicate.
I changed "Directional Light" values to:
- Intensity: .01
- Light Color (Hex sRGB): D3FFFEFF
![]()
I've "Build Lighting" on "Preview" but know that we still have "Auto Exposure" using default values, so lighting intensity will vary greatly depending what you are viewing:

Note about light color: originally I was going to go with green color palette but later in the process I decided to change it to blue. We'll do this later using "Color Grading".
Lightmass Importance Volume
Insert a "Lightmass Importance Volume":

Scale this volume to cover the important parts of your level where you want to focus your lighting in:

Atmospheric Fog
"Atmospheric Fog" relies on the "Directional Light" to calculate fog. In "star sky" lighting tutorial we disabled "Atmospheric Fog" as it wasn't being used. In this tutorial we are going to use it.
Insert "Atmospheric Fog":

Select "Directional Light" and enable "Atmosphere/Fog Sun Light":
![]()
You will now have "BP_Sky_Sphere", "Directional Light" and "Atmospheric Fog" connected to work together:
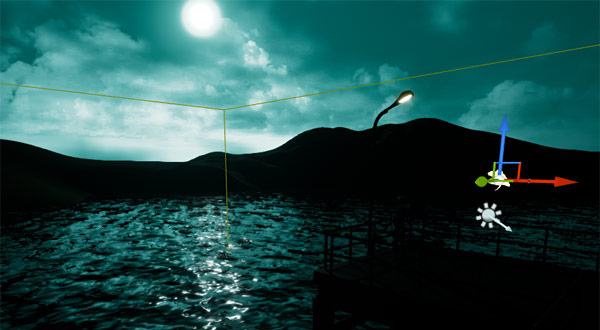
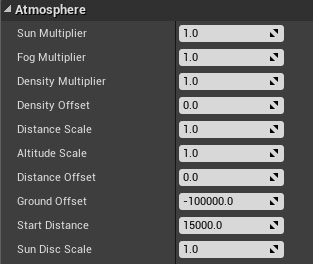
You also have a set of values you can play around with under "Atmospheric Fog". I didn't change any values for this tutorial.
Insert a Sky Light
Insert a "Sky Light" into the scene:

"Sky Light" will use the scene's sky sphere to light the scene. The "SLS Capture Scene" option, just like in the "star sky" example:

You will see lighting changes in the scene but it is not accurate. It would seem that the "Directional Light" and "Sky Light" are too intense and need to be changed but this is NOT the case. We reall need to set our "Auto-Exposure" to properly expose for night time.

Post Process Volume and Auto Exposure
Insert "Post Process Volume":


Make "Post Process Volume" universal by enabling "Infinite Extent (Unbound)":
![]()
Let's clamp "Auto-Exposure" (Eye Adaptation) to be adjusted to our scene. Change "Min/Max Brightness" values. Make sure you adjust these to your scene:
- Min Brightness: .3
- Max Brightens: .4
- Exposure Bias: adjust this if you need to add some brightness to the scene; I kept this at 0
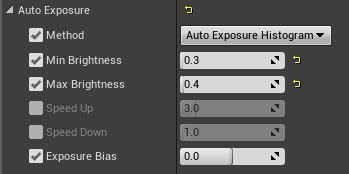
Result:
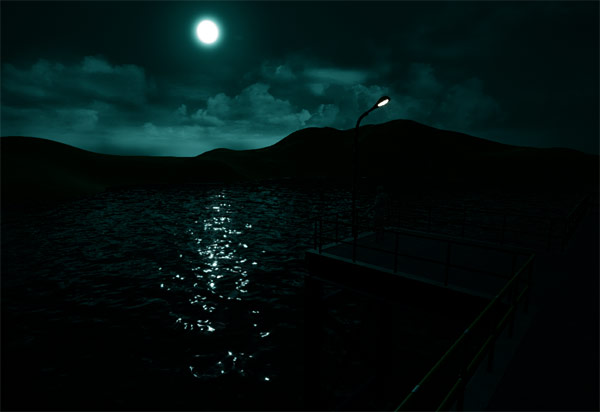
Adjusting Sky Light
"Sky Light" is affecting our scene but not strong enough. Select the "Sky Light" and set the following options:
- Intensity: 1
- Indirect Lighting Intensity: 25

Let's bake lighting to see what the environment looks like right now with adjusted "Sky Light". We are going to "Bake Lights" on "Preview":

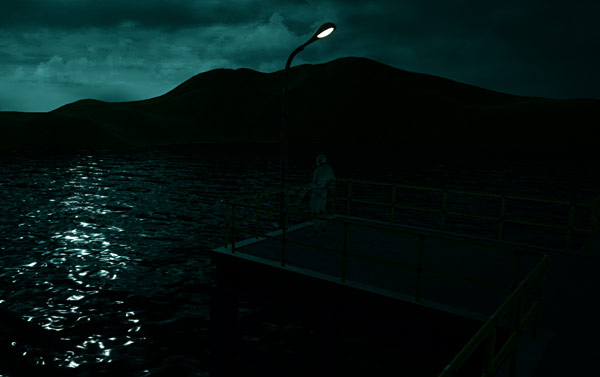
Important Note: just like in the first tutorial I have to mention that night time lighting is subtle and doesn't come through in screenshots as much as it does on the monitor. So screenshots below may see like they are too dark.
"Sky Light" with "Intensity: 1" and "Indirect Lighting Intensity: 1":
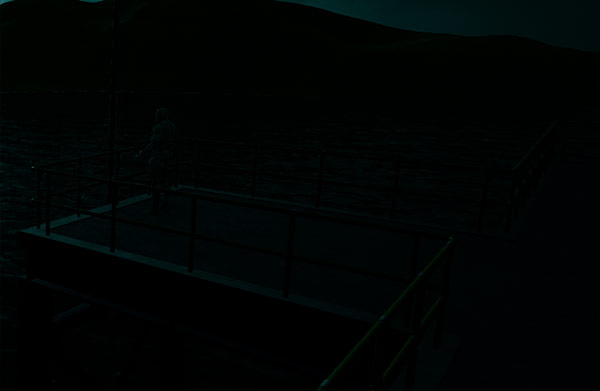
Updated "Sky Light" with "Intensity: 1" and "Indirect Lighting Intensity: 25":

Environment Color
Just like in the "star sky" tutorial we will "Environment Color" to add a constant color into the scene.
Under "World Settings":

I changed "Environment Color" values to ("Hex sRGB: 031918FF"):
- R = 3
- G = 25
- B = 24
- A = 255

Be aware of the "Environment Color" limitations covered in the previous tutorial. To see the results we need to "Build Lighting".
With "Environment Color", slightly increasing overall brightness:
Adjusting Sun Disk Brightness
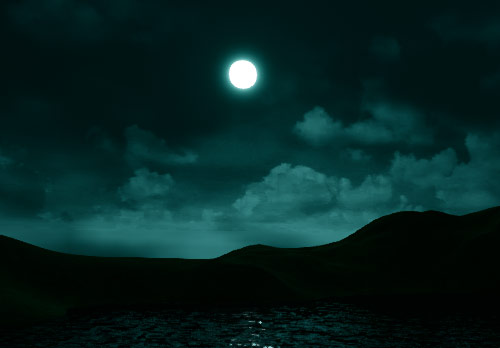
We will be using the sun disk in "BP_Sky_Sphere" as our moon. Select the sky sphere and adjust the brightness of the moon:
- Sun Brightness: 15
![]()
Cloud Speed, Cloud Opacity and Star Brightness
Select "Blueprint Sky" and change "Cloud Speed" and "Cloud Opacity" to what you want:

I changed my values to:
- Cloud Speed: 2
- Cloud Opacity: .5
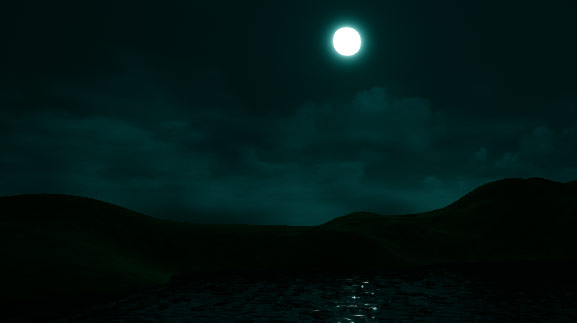
"Star Brightness" property will not have any effect.
Spot Lights
We'll use the same light post Static Mesh and a "Spot Light" set up as in the first tutorial.

In this example for the "Spot Light" I used:
- Intensity: 15000
- Color Hex sRGB: F6E3B5FF
- Inner Cone: 50
- Outer Cone: 75
- Temperature: 5500

Result:

Exponential Height Fog
We need to add some atmosphere into this environment. Insert "Exponential Height Fog":

I've adjusted the properties to fit the moon sky scene:
- Fog Density: .35
- Fog Inscattering Color (Hex sRGB): 0F201FFF
- Fog Height Fall Off: .2
- Fog Max Opacity: .5
- Start Distance: 250

Result:

Let's also enable "Volumetric Fog":
- Enable "Volumetric Fog"
- Extinction Scale: .6 (fog absorbs more light, makes it more misty)
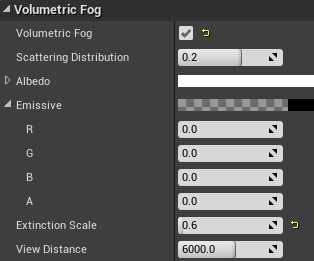
Result:

Soft "Directional Light" Shadows
Because we are using a "Directional Light" it will cast shadows. In a moon lighting situation, it is what we want.
But you may want to cast softer shadows.
Select "Directional Light" and enable:
- Use Area Shadows for Stationary Lights
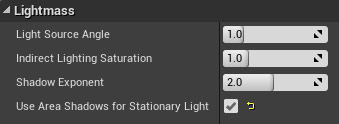
This will give you softer shadows the further they are away from the object. Here is an example what it looks like in a day light scene:
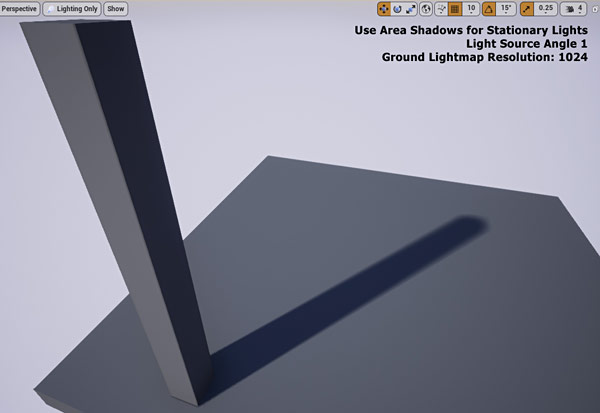
You can increase "Light Source Angle". This option will determine how soft the shadows become the further they are away from the contact source. "Light Source Angle" set to 5.

To get good soft shadow results you'll have to increase "Lightmap Resolution" of the Static Meshes that are receiving the shadows. Make sure to bake lighting on "High" or "Production".
I kept the shadows the same without making them soft.
Building Lighting
Just as in the first tutorial, you'll need to constantly bake test the lighting to see how your environment is being lit. Especially when you change "Sky Light" and "Environment Color" settings.
Here is what we have so far after building lighting:

LUT (Color Look Up Table)
The lighting we have is a good start but we need to improve the scene colors, saturation and contrast.
I did a poll on Twitter asking which color palette was better - green or blue. Based on feedback I decided to go with a blue color palette. So with the LUT, we'll be changing the green scene colors to blue.
#UE4 Color Grading Test.
— WorldofLevelDesign (@GameLevelDesign) January 19, 2018
Which one Blue or Green? pic.twitter.com/dBKgEySx6U
Make sure you've read the "LUT (Color Look Up Table)" section in the previous tutorial.
Here is the LUT texture again, which can also be downloaded at Unreal Engine.com here.
LUT 256x16 PNG Texture (Right-Click and Save As)
I took a screenshot of the scene and in Photoshop added the following "Adjustment Layers - "Curves", "Levels", "Color Balance" and "Hue/Saturation". It is here that I changed colors of the scene from green to blue:
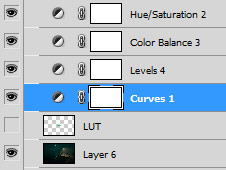
Below is the actual adjusted PNG LUT texture. If you want to use this in UE4, make sure you "Right-Click and Save As" the image below then import it into UE4:
![]()
Result in Photoshop:
I saved and exported the LUT as PNG file and imported it into UE4. Making sure to change its properties to:
- Texture Group: ColorLookupTable
- Mip Gen Settings: NoMipmaps

In "Post Process Volume" under "Color Grading LUT" I used the imported LUT texture:

Final Scene with LUT:

Post Process Color Grading
We covered the limitations of LUTs and that Epic now recommends using new "Color Grading" options introduced in Unreal Engine 4.16.
So with that I used the LUT as a target to aim for but then adjusted the colors using "Post Process Volume: Color Grading" settings to match. You can find "Color Grading" options here and make sure to disable the LUT option:
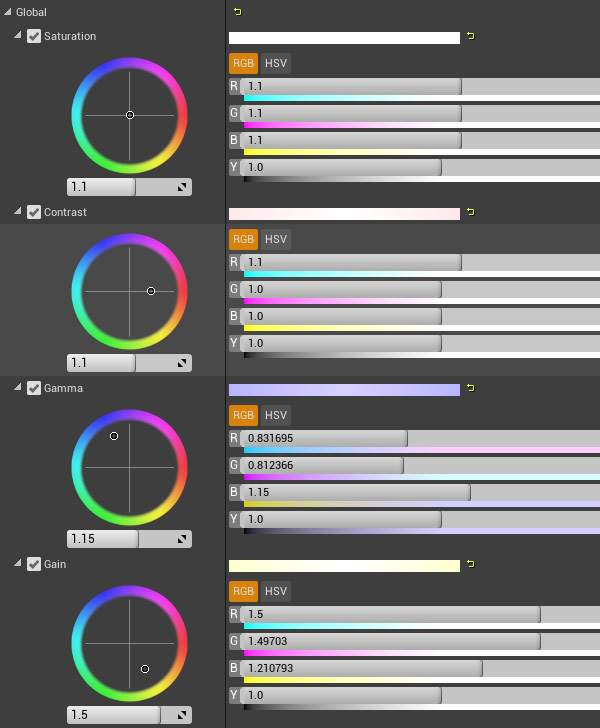
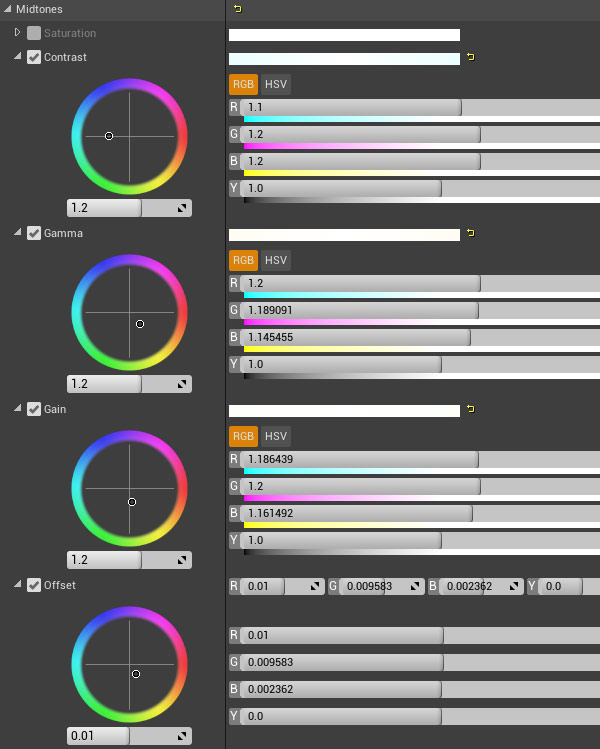

Final Result (with LUT disabled) and with only "Post Process: Color Grading":

Next Tutorial: UE4: Night Time Lighting - Star Sky (Static/Baked Lighting) Part 1/2
Home Terms of Use/Trademarks/Disclaimers Privacy Policy Donate About Contact
All content on this website is copyrighted ©2008-2024 World of Level Design LLC. All rights reserved.
Duplication and distribution is illegal and strictly prohibited.
World of Level Design LLC is an independent company. World of Level Design website, its tutorials and products are not endorsed, sponsored or approved by any mentioned companies on this website in any way. All content is based on my own personal experimentation, experience and opinion. World of Level Design™ and 11 Day Level Design™ are trademarks of AlexG.
Template powered by w3.css


 Modular Environment Design Masterclass Tutorial Course
 Maya Foundation: Home-Study Course - Model and UV Environments
 Substance 3D Painter Essentials - Master Texturing
 UE5: Fundamentals Vol.1 - Create with Unreal Engine 5
 UE5: Retro Office Project - Create Beautiful Interior Env
 UE5: Master Material Creation - Create Master Materials in UE5
 Preproduction Blueprint: Plan Environments and Level Designs


