World of Level Design™
Tutorials to Becoming the Best Level Designer and Game Environment Artist (since 2008)
Actor X is a tool, a plug in for Unreal Engine to import models and animations from a 3d package to Unreal. In this case, from Maya to Unreal.
Its very simple to install and use.
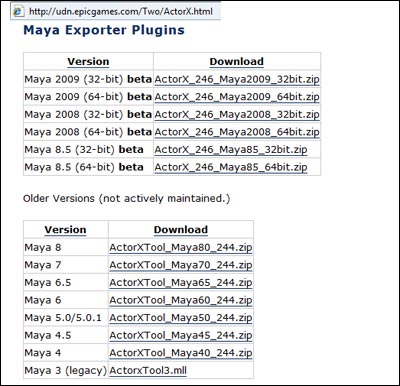
First head over to UDN website and download your plug in. Depending what Maya version you use and what bit Windows you are running.

After unzipping folder you should have a single file, ActorXTool.mll
Navigate to your Maya folder and find plug-ins directory. If it doesn't exist just create a new folder called plug-ins.

Place ActorXTool.mll inside the plug-ins folder.

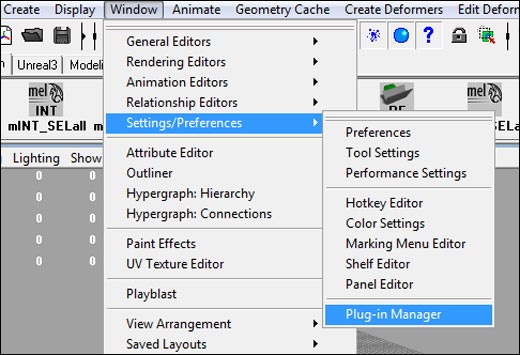
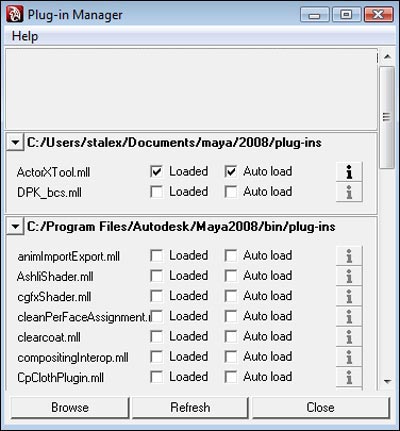
Next we want to open Maya and turn ActorX on through Plug-in Manager.
Window --> Setting/Preferences --> Plug-in Manager

Check ActorXTool.mll, Loaded and Auto load.

Next, open up your script editor and type in axmesh; then press Control + Enter.

After you execute the command, this window should pop up.
When exporting your geometry pay attention to these. I have the following checked on.

Our last step is to place a quick execute command on our shelf. That way we don't have to execute our script through script editor every time.
Open up the script editor and on the upper part it shows you the commands that have been executed previously.
Find our axmesh; and highlight it. Then, MiddleMouseButton Click and Drag onto our shelf.

We now have axmesh; command on our shelf.

That is it for installing ActorX plug-in. Now, begin exporting your models.
Home Terms of Use/Trademarks/Disclaimers Privacy Policy Donate About Contact
All content on this website is copyrighted ©2008-2024 World of Level Design LLC. All rights reserved.
Duplication and distribution is illegal and strictly prohibited.
World of Level Design LLC is an independent company. World of Level Design website, its tutorials and products are not endorsed, sponsored or approved by any mentioned companies on this website in any way. All content is based on my own personal experimentation, experience and opinion. World of Level Design™ and 11 Day Level Design™ are trademarks of AlexG.
Template powered by w3.css


 Maya Foundation: Home-Study Course - Model and UV Environments
 Substance 3D Painter Essentials - Master Texturing
 UE5: Fundamentals Vol.1 - Create with Unreal Engine 5
 UE5: Retro Office Project - Create Beautiful Interior Env
 UE5: Master Material Creation - Create Master Materials in UE5


