World of Level Design™
Tutorials to Becoming the Best Level Designer and Game Environment Artist (since 2008)
Substance Painter: 4 Powerful Methods of Creating Tiling or Detail Normal Maps from Height to Export and Use
Category: Substance Painter
June 08, 2026
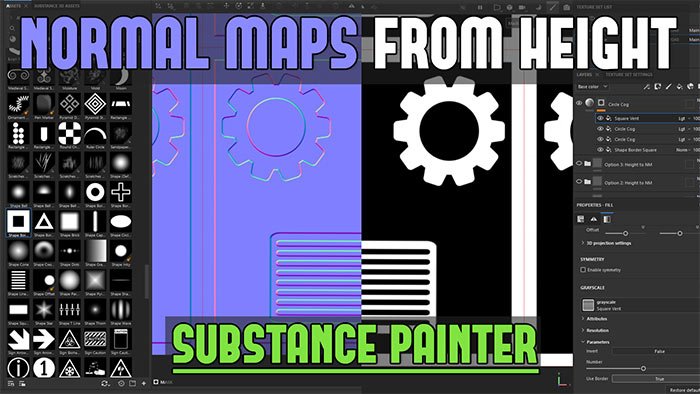
In this comprehensive tutorial, you'll learn 4 powerful techniques for generating unique normal maps directly from height textures and alphas inside Substance Painter. These options will produce high-quality normal maps that can be exported and reused in UE4/UE5 or any other game engine or 3D software.
These workflows are especially useful when you need to combine and blend multiple normal maps for added variation in your materials.
Whether you're creating tiling textures, tiling details or trim sheets, mastering Height-to-Normal creation in Substance Painter will give you more direct artistic control.
Video Tutorial
Scene Setup
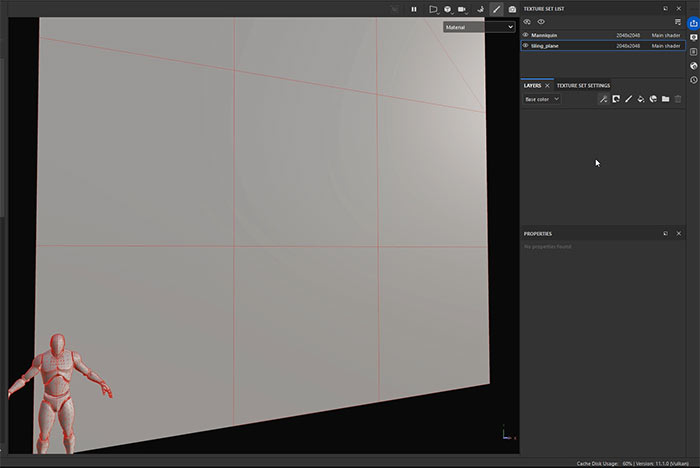
Before diving in, here's the scene used in this tutorial:
- A large tiled plane divided into 3x3 quads. This helps visualize tiling, repetition and potential seams. Enable wireframe mode to see how changes in one quad repeat across the surface.
- A scale mannequin for judging texture scale relative to a player character.
I use this standard setup all the time for tiling texture creation.
Option 1: Simple Height to Normal Conversion
This is the quickest method for basic Height-to-Normal creation.
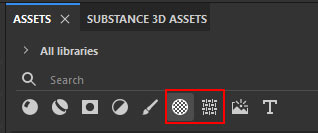
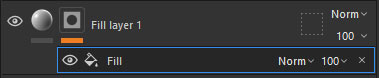
Create a new Fill Layer and enable only the Height channel (you can optionally keep Color and Roughness visible for preview purposes but they won't be needed for export):

Drag a Black-and-White Alpha or Texture directly into the Height input slot:

Switch between viewing modes:
- Material view: See the result with lighting.
- Height view: See the results of black-and-white height.
- Normal + Height Mesh view: Preview the final normal map output.

Adjust parameters in the Alpha/Texture settings. Alphas and Textures will offer different options depending on which you use:

Exporting:
- Go to File > Export Textures (Ctrl+Shift+E).
- Choose an Unreal Engine packed preset (works for both UE4 and UE5).
- Select only the Normal map channel.
- Export as PNG 8-bit at your texture set resolution (e.g., 2K).
The height information is automatically converted to a normal map on export. Note that Unreal Engine uses DirectX normal maps (green channel flipped), while OpenGL-based tools (Maya, Blender, Unity) use the opposite green channel.

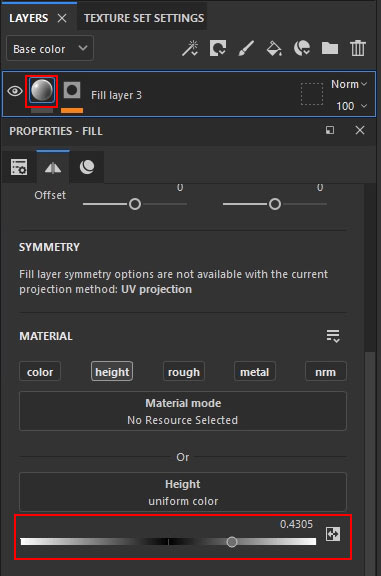
Option 2: Greater Control with Black Masks and Fill Effects
This is the most common method I use. It will give you more direct control over height intensity.
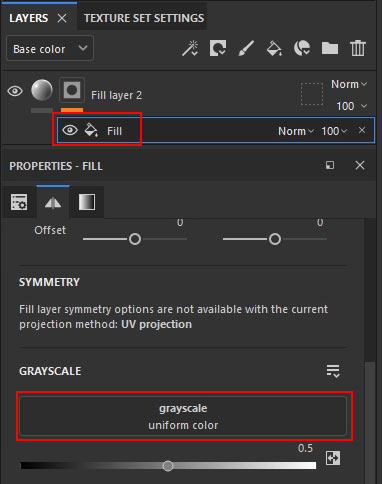
Create a Fill Layer and enable only the Height channel like in previous step:
Right-click the layer icon and choose add Black Mask:

Right-click the Black Mask icon and choose to add Fill Effect:

Drag your Black-and-White Texture or Alpha into the Grayscale input of the Fill Effect:

Go back to the main Fill Layer and adjust the Height intensity slider (positive values raise surfaces; negative values indent them):


Key Advantages:
- Intensity control independent of the Texture or Alpha being used
- Stack multiple Fill Effects inside the same black mask.
- Change blend modes between Fill Effects to combine details.
This setup allows non-destructive blending and is perfect for building complex, tiling Height maps which become your Normal Maps on Export.
Option 3: Paint Effects for Precise Placement
Use this method when you need to manually place or stamp specific elements.
Create a Fill Layer (Height only) + Black Mask:

Right-click the black mask and choose to add Paint Effect:

In the Paint Effect settings, load an Alpha into the Alpha property (not Grayscale):

Paint/Stamp elements from the Alpha or Texture being used:

The Grayscale value of 0-1 will control the height value being stamped: white (adds) or black (removes):


You can then go back to main Fill Layer and adjust Height intensity:
Tips:
- Use bracket keys [ ] to resize the brush.
- Switch to 2D view (F3) or side-by-side view (F1) for precise alignment.
- Stack Paint Effects with regular Fill Effects for more blending control.
- Adjust overall intensity at the main Fill Layer level.
This approach is great for trim sheets, decals or any situation requiring exact positioning of stamped detail elements.
Option 4: Projection Method for Flexible Positioning
This is the most flexible option for movable and scalable projected elements.
Quick Automatic Method:
Drag any Alpha or Texture directly onto the 3D mesh in the viewport and choose Mask. This creates a Fill Layer, Black Mask and assigns the Alpha or Texture as a Fill Effect:

Adjust the main Fill Layer's Height intensity. Also make sure you have the Height channel enabled:

Select the Fill Effect and press Q to enable the projection manipulator: Use W (Move), E (Rotate), R (Scale) to adjust the Projection.

Manual Setup: this will help you understand what is happening behind the automatic process above.
Create a Fill Layer (Height channel only), then add a Black Mask and a Fill Effect into the Black Mask:
Load Alpha or Texture into Grayscale input of the Fill Effect:

In the Fill Effect, change the following setting for Projection to work:
- Projection from UV to Warp.
- Set UV Wrap to None.
- Use Projection Depth if the projection isn't appearing on your mesh.

Then use the manipulator tools as above to position, scale or rotate the projection:

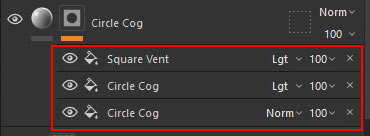
Blending Filla nd Paint Effects:
You can also start stacking and blending different Fill and Paint Effects together:
- Duplicate Fill or Paint Effects(Ctrl+D) and change Alpha or Texture to something else
- Adjust Blend Modes to combine projections or Fill Effects and you can also adjust the opacity.
Exporting and Final Notes
For all methods:
- Use File > Export Textures (Ctrl+Shift+E).
- Select Unreal Engine preset or any other preset you are using to export your textures as.
- Export only the Normal map.
- Rename the exported textures when generating multiple Normal Maps versions from the same project to avoid overwriting.

Important Reminder: UE4/UE5 creates DirectX normal maps. If the lighting looks inverted in other software, flip the Normal Map's Green Channel or use a different export preset that creates OpenGL Normal Map format.
Want to Master Substance Painter?
If you want to fast-track your environment texturing skills, check out the “Substance Painter Essentials” tutorial course. It takes you from beginner to confident texturing artist, covering everything you need to create production-quality materials for games and real-time projects.

SUBSCRIBE & GET FREE, UPDATED PDF GUIDE
Subscribe to receive FREE & Updated "Maya 3D Primer" PDF Guide (200+ pages).

See more about this Free PDF Guides and what you are subscribing to.
TOP 7 TUTORIAL COURSES FOR 2026
 Modular Environment Design Masterclass Tutorial Course
 Maya Foundation: Home-Study Course - Model and UV Environments
 Substance 3D Painter Essentials - Master Texturing
 UE5: Fundamentals Vol.1 - Create with Unreal Engine 5
 UE5: Retro Office Project - Create Beautiful Interior Env
 UE5: Master Material Creation - Create Master Materials in UE5
 Preproduction Blueprint: Plan Environments and Level Designs
TUTORIAL CATEGORIES
SUBSTANCE PAINTER ESSENTIALS

MAYA FOUNDATION COURSE

MODULAR ENVIRONMENTS MASTERCLASS

ABOUT WoLD & ALEXG

My name is AlexG. I am self-taught level designer, game environment artist and the creator of World of Level Design.com. I've learned everything I know from personal experimentation and decades of being around various online communities of fellow environment artist and level designers. On World of Level Design you will find tutorials to make you become the best level designer and game environment artist.
Home Terms of Use/Trademarks/Disclaimers Privacy Policy Donate About Contact
All content on this website is copyrighted ©2008-2024 World of Level Design LLC. All rights reserved.
Duplication and distribution is illegal and strictly prohibited.
World of Level Design LLC is an independent company. World of Level Design website, its tutorials and products are not endorsed, sponsored or approved by any mentioned companies on this website in any way. All content is based on my own personal experimentation, experience and opinion. World of Level Design™ and 11 Day Level Design™ are trademarks of AlexG.
Template powered by w3.css