World of Level Design™
Tutorials to Becoming the Best Level Designer and Game Environment Artist (since 2008)
Substance Painter: Create Perfect Tiling Dirt/Grunge/Leak Masks for Texture Blending for Game Art
Category: Substance Painter
January 28, 2026
Texture masks are essential for blending multiple textures seamlessly or adding realistic wear effects like dirt, grunge and leaks.
These are grayscale textures (where white reveals and black conceals) enable precise control over texture blending.
In this guide I will walk you through 3 options to creating perfect dirt, leak, grunge texture masks using Substance Painter.
Video Tutorial
Project Setup Basics
I have a scene set up in Substance Painter with a tiling plane mesh imported to test seamless repetition. You can see how I set this up in this tutorial here. I will also be working with texture resolution at 2048×2048:
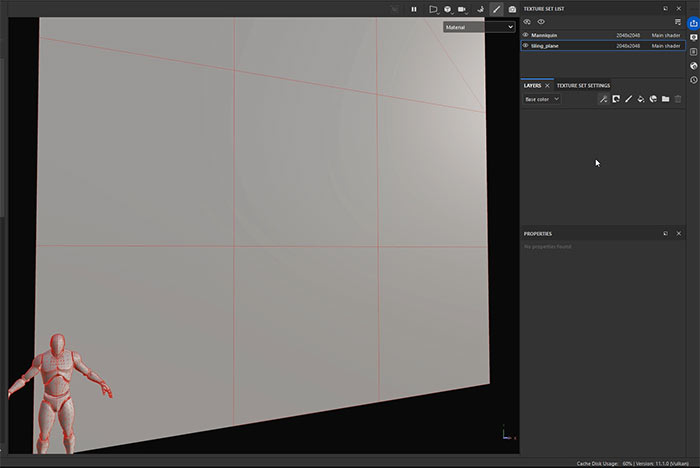
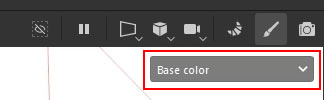
Switch viewport display to Base Color only to eliminate lighting. It'll be easier to see what your mask will be doing this way.
Always remember: White reveals information, black conceals it and grays create various transitions in-between.
Option 1: Basic Grunge/Noise Mask (Full-Surface Blending)
This option will create general-purpose, tiling mask ideal for overall dirt, grunge or random blending.
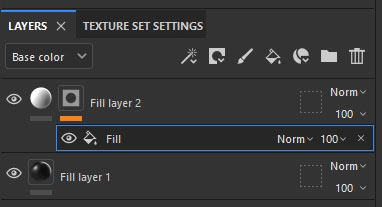
- Create a Fill Layer (Color channel only) with Base Color set to black
- Add another Fill Layer on top (Color only) with Base Color set to white
- Create Black Mask on top Fill Layer
- Add fill effect into the Black Mask
In the Grayscale property of the Fill Effect, drag a texture from the Library - Textures:
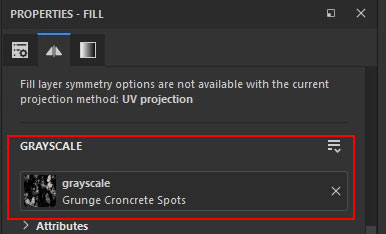
Tweak properties for this Mask Texture such as (Balance, Contrast, Tiling etc.) until satisfied.
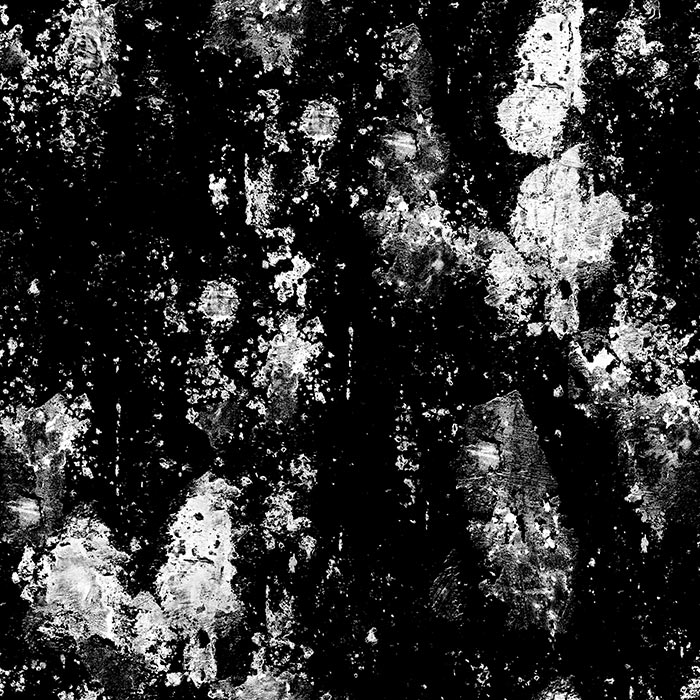
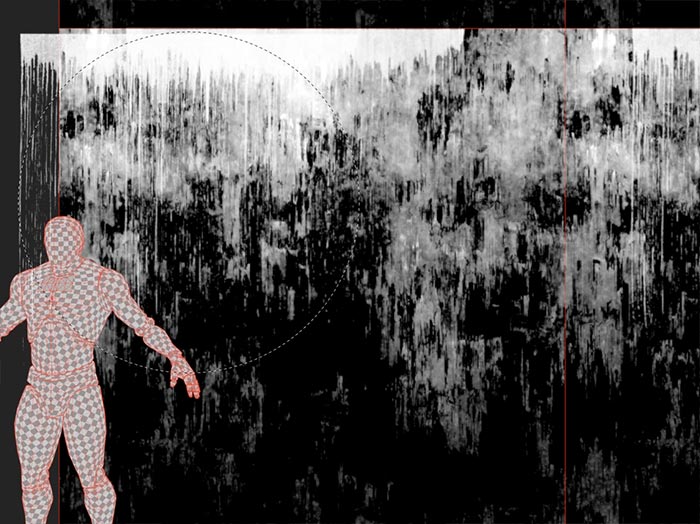
Here is the result of the mask:
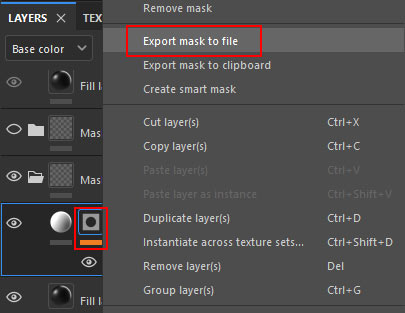
Export: Right-click on the Black Mask Fill Layer icon and choose Export Mask to File.
Photoshop 16-bit to 8-bit Texture Conversion
This mask texture is saved as 16-bit grayscale but you only need 8-bit and preferably RGB so you can pack more textures into individual channels. To make this conversion, open up this exported mask texture in Photoshop.
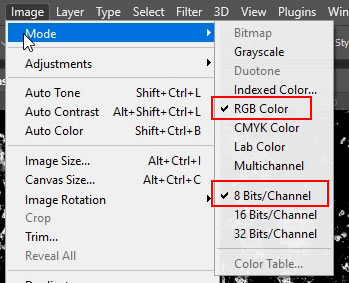
- Go to Image > Mode > RGB Color
- Then back to Image > Mode > 8 Bits/Channel
- Save
This produces a clean, tiling mask ready for blending two textures (e.g., concrete base + dirt overlay).
Option 2: Directional/Gradient-Based Mask (Leaks, Bottom Dirt, etc.)
Perfect option for accumulation effects like ground dirt buildup or downward leaks.
Use the same base set up as in Option 1.
- Create a Fill Layer (Color channel only) with Base Color set to black
- Add another Fill Layer on top (Color only) with Base Color set to white
- Create Black Mask on top Fill Layer
- Add fill effect into the Black Mask
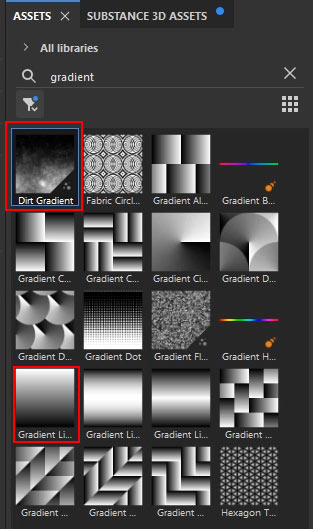
In the Grayscale property of the Fill Effect, drag one of the following black/white textures from the Library - Textures.
- Dirt Gradient or Gradient Linear
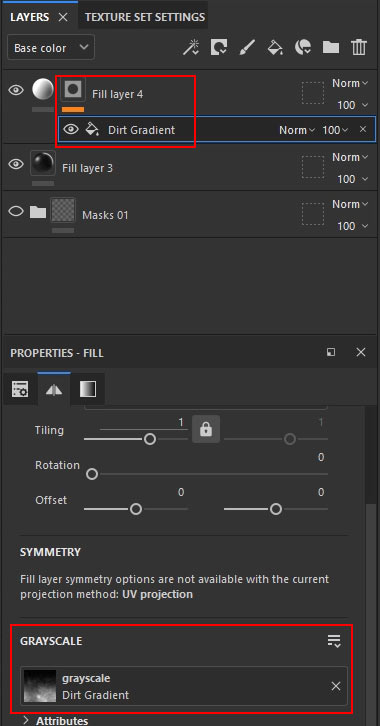
Create another Fill Effect to appear above the first Fill Effect. In this Fill Effect Grayscale property, drag a texture from the Library – Textures.

- Fill Effect (top) will be the texture that will be your texture mask (Grunge Leaky Paint)
- Fill Effect (bottom) will create the gradient transition (Dirt Gradient)
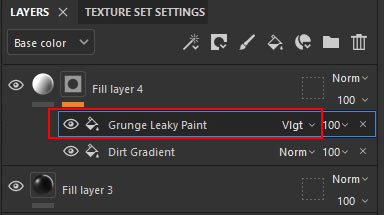
Change the top Fill Effect's Blend Mode (e.g., Subtract, Overlay, Multiply) for best transition with the Fill Effect below.
Adjust parameters for each effect:
- Grunge texture: Balance, Contrast etc.
- Gradient: Balance, Contrast, Disorder, Rotation etc.
Continue changing properties for both Fill Effects until you like the result.

When done, Export as before in Option 1 and convert the texture mask to 8-bit RGB.
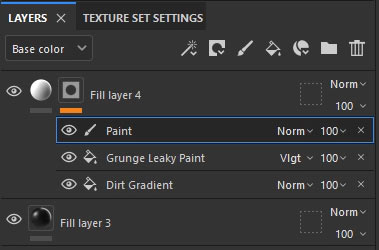
Add Paint Effect to Tweak the Mask's Black/White Values Manually
You can manually paint in black or white values to change how your final mask will look.
- Right Click on Black mask and Add Paint
- Use brushes/alphas to manually reveal (white) or conceal (black) areas non-destructively.
When done, export as before in Option 1 and convert the texture mask to 8-bit RG in Photoshop.
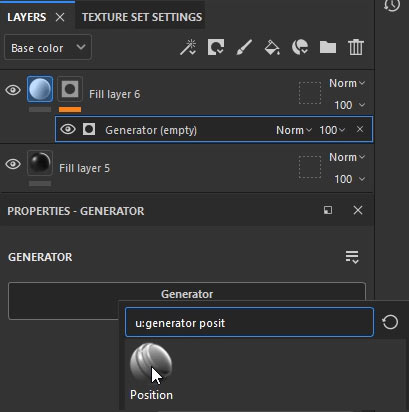
Option 3: Position Generator Mask (Advanced Gradient Control)
This final option works similar to option 2 but instead we'll use a Generator.
Use the same base set up as in Option 1.
- Create a Fill Layer (Color channel only) with Base Color set to black
- Add another Fill Layer on top (Color only) with Base Color set to white
- Create Black Mask on top Fill Layer
Now instead of adding Fill Effect into the Black Mask, Add Generator instead. Then in properties, search and select Position generator:
- Enable Use Texture set to true
- Under Texture tab, Image Inputs, drag a grunge/dirt texture
- Increase Texture Opacity to 1
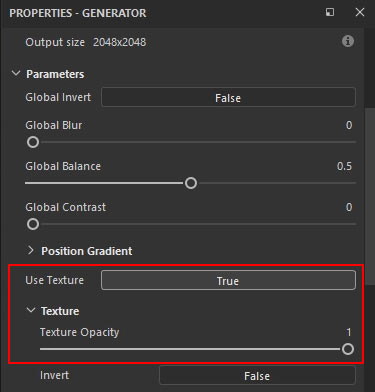

Then adjust various properties of the Generator:
- Tweak Texture: Invert, Blend Mode, Scale, Contrast, Brightness etc.
- Position parameters: Global Balance, Global Contrast, Global Blur, etc.
Add a Paint effect for manual tweaks if needed.
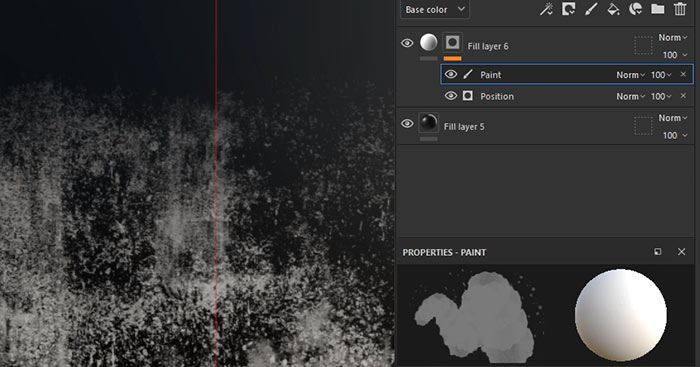
When done, export as before in Option 1 and convert the texture mask to 8-bit RG in Photoshop.
This method consolidates controls into one Generator for quick positional texture mask creation.
Using the Masks in UE5
Here is how to quickly use the created texture masks in UE5.
- Import the PNG masks into UE5
- Open each in Texture Editor: Disable sRGB (Masks must use Linear Color Space)
- Save
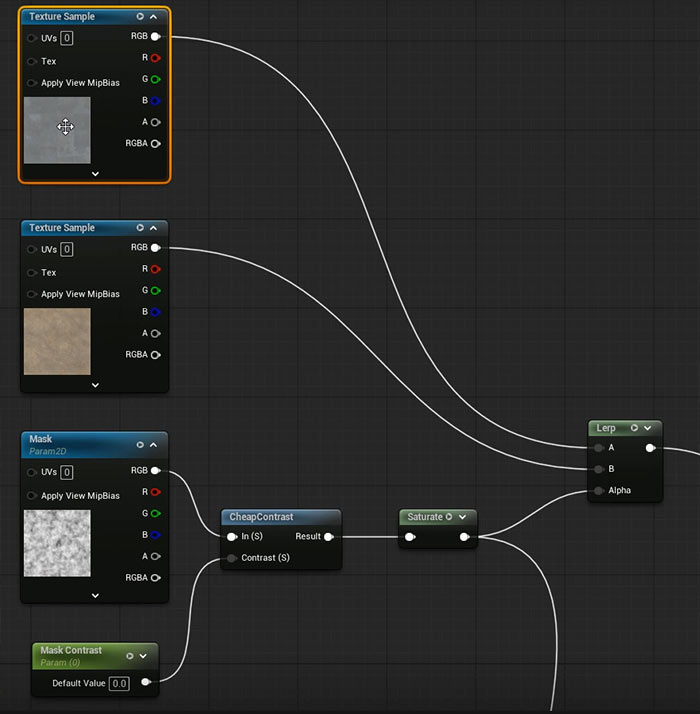
You can now use the texture masks as part of your Material in UE5. Here is a quick setup for blending between 2 color textures using a Lerp and the created texture mask:
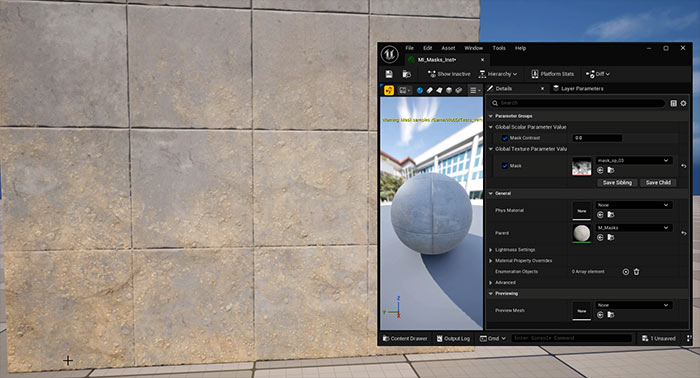
Another result in UE5 from one of the masks with gradient transition from the bottom:
Substance Painter Essentials Tutorial Course
If you're new to Substance Painter or want to get back into then in this complete tutorial course I will show you how to texture with Substance 3D Painter in ONLY 6 hours.

SUBSCRIBE & GET FREE, UPDATED PDF GUIDE
Subscribe to receive FREE & Updated "Maya 3D Primer" PDF Guide (200+ pages).

See more about this Free PDF Guides and what you are subscribing to.
TOP 7 TUTORIAL COURSES FOR 2026
 Modular Environment Design Masterclass Tutorial Course
 Maya Foundation: Home-Study Course - Model and UV Environments
 Substance 3D Painter Essentials - Master Texturing
 UE5: Fundamentals Vol.1 - Create with Unreal Engine 5
 UE5: Retro Office Project - Create Beautiful Interior Env
 UE5: Master Material Creation - Create Master Materials in UE5
 Preproduction Blueprint: Plan Environments and Level Designs
TUTORIAL CATEGORIES
SUBSTANCE PAINTER ESSENTIALS

MAYA FOUNDATION COURSE

MODULAR ENVIRONMENTS MASTERCLASS

ABOUT WoLD & ALEXG

My name is AlexG. I am self-taught level designer, game environment artist and the creator of World of Level Design.com. I've learned everything I know from personal experimentation and decades of being around various online communities of fellow environment artist and level designers. On World of Level Design you will find tutorials to make you become the best level designer and game environment artist.
Home Terms of Use/Trademarks/Disclaimers Privacy Policy Donate About Contact
All content on this website is copyrighted ©2008-2024 World of Level Design LLC. All rights reserved.
Duplication and distribution is illegal and strictly prohibited.
World of Level Design LLC is an independent company. World of Level Design website, its tutorials and products are not endorsed, sponsored or approved by any mentioned companies on this website in any way. All content is based on my own personal experimentation, experience and opinion. World of Level Design™ and 11 Day Level Design™ are trademarks of AlexG.
Template powered by w3.css