World of Level Design™
Tutorials to Becoming the Best Level Designer and Game Environment Artist (since 2008)
Texturing: How to Pack Multiple Black and White Textures into Single RGB Texture with Photoshop (w/UE5 Example)
Category: Texturing, UE5
February 02, 2026

Texture optimization is key in game development for improving performance.
One of these methods is to pack separate black-and-white textures such as texture masks, roughness, metallic or ambient occlusion maps into the Red, Green and Blue channels of one texture file.
In this post I will show you how to do this using Photoshop.
Video Tutorial
Step 1: Prepare Your Textures
Start with 3 grayscale textures you want to pack. These could be:
- Texture masks (e.g., dirt, wear, edge damage)
- Roughness maps
- Metallic maps
- Ambient occlusion maps
Or any combination, as long as they are black-and-white and intended for linear color space.
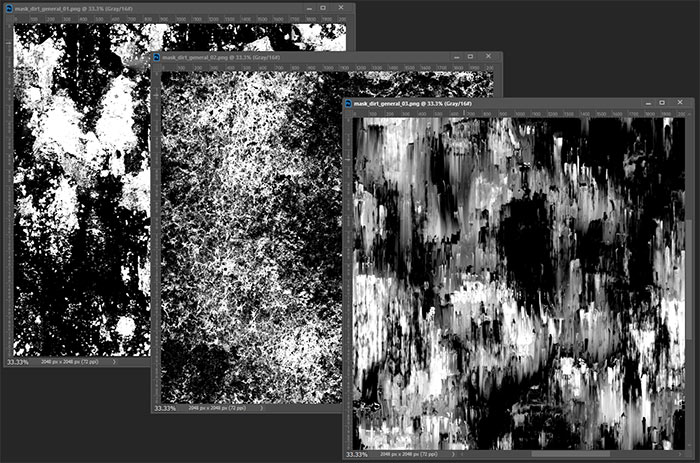
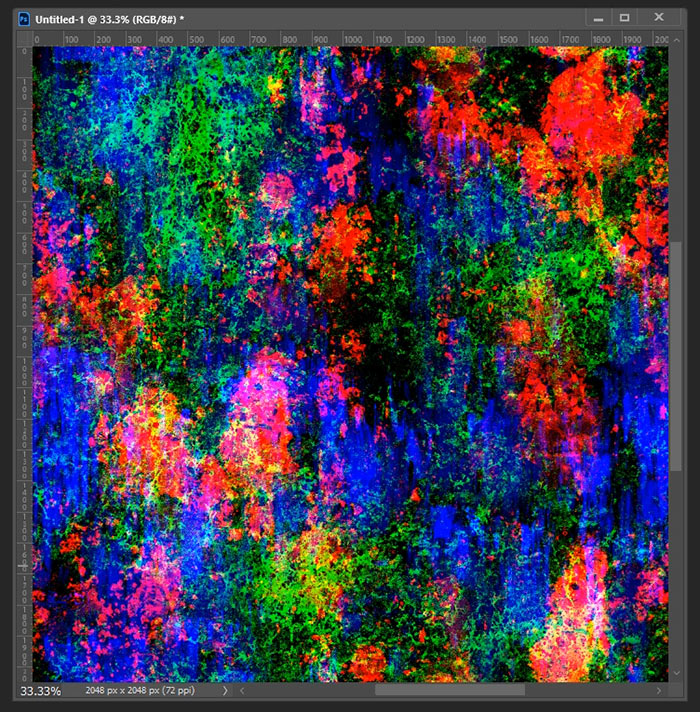
Open all three textures in Photoshop to check their dimensions. Go to Image > Image Size for each one. In this example, the textures are 2K (2048 × 2048 pixels).
Here are the 3 texture masks I will be using to pack into a single texture:
Step 2: Create a New RGB Document
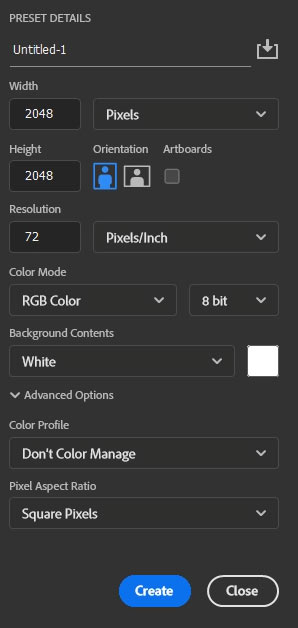
Create a new file that matches the dimensions of your source textures:
- Go to File > New
- Set Width and Height to 2048 pixels (or your texture size)
- Resolution: 72 ppi
- Color Mode: RGB Color
- Bit Depth: 8 bit
Click Create.
This new document will become your packed texture.
Step 3: Pack Each Texture into a Channel
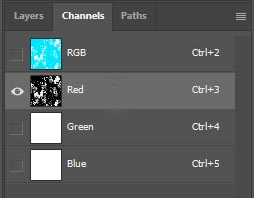
Switch to the Channels:
- Go to your first source texture
- Press Ctrl + A (Select All) to select the entire canvas
- Press Ctrl + C (Copy)
- Switch to your new document
- Select the Red channel only
- Press Ctrl + V (Paste)
The first texture now lives in the Red channel.
Repeat the same steps for two other additional textures for the Green and Blue channels.
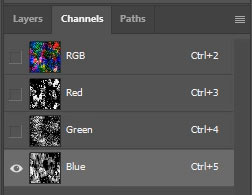
To preview the combined result, click the RGB. You'll see a colorful mix, this is normal as each channel holds independent grayscale texture data.
Step 4: Export the Packed Texture
- Go to File > Export > Export As
- Format: PNG
- Keep dimensions at 2048 × 2048 (or downscale to 1K/512 if need it)
- Disable transparency
- Name it clearly
- Export to your desired folder

Step 5: Import and Set Up in Unreal Engine 5
- Import the packed texture into UE5
- Double-click the imported texture to open the Texture Editor
- Critical step: Uncheck sRGB
- Save the texture

Step 6: Using the Packed Texture in a Material
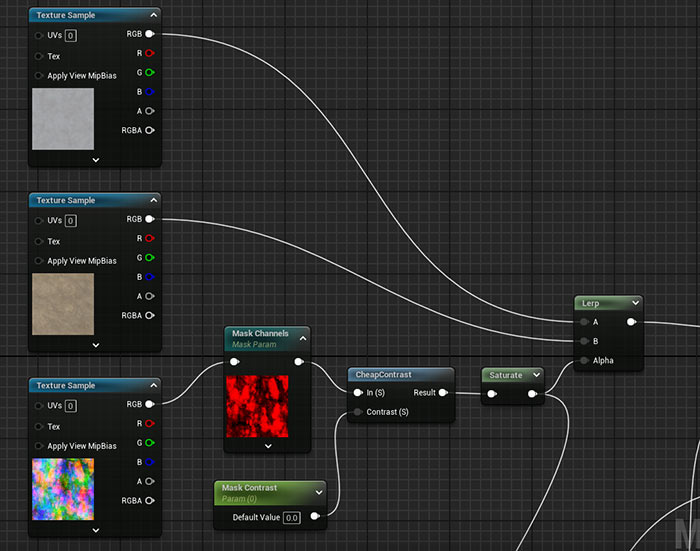
In UE5, I've set up basic blend between 2 textures using a Lerp.
Then brought it the packed mask texture and used a Component Mask (converted to parameter) in order to let me select individual RGB channels through the Material Instance.
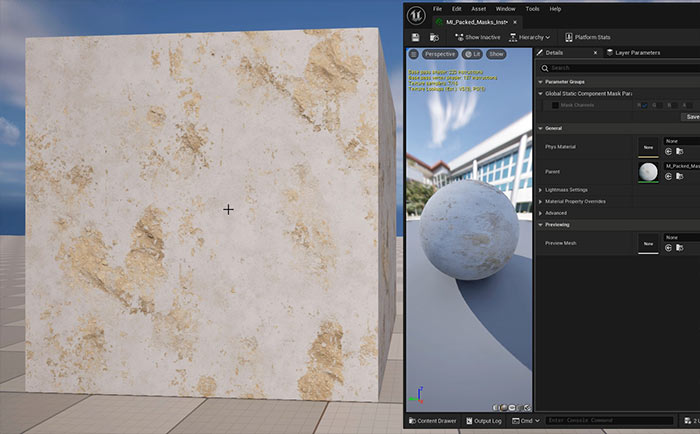
Test all the channels of the packed masked texture before using it:
Benefits and Tips
Performance gain: One texture sample instead of three.
Common packing conventions (for ARM textures):
- Red: Ambient Occlusion
- Green: Roughness (often preferred here due to better bit allocation in some compressions)
- Blue: Metallic
You can add a fourth map to the Alpha channel if needed, but this switches compression to DXT5 (higher memory use).
Texturing Tutorial Courses to Take Your Knowledge Further
Master texturing environments and props with Substance 3D Painter in just 6 hours and learn everything you need to know to begin creating and using UE5 standard Material Editor for environments and props.

SUBSCRIBE & GET FREE, UPDATED PDF GUIDE
Subscribe to receive FREE & Updated "Maya 3D Primer" PDF Guide (200+ pages).

See more about this Free PDF Guides and what you are subscribing to.
TOP 7 TUTORIAL COURSES FOR 2026
 Modular Environment Design Masterclass Tutorial Course
 Maya Foundation: Home-Study Course - Model and UV Environments
 Substance 3D Painter Essentials - Master Texturing
 UE5: Fundamentals Vol.1 - Create with Unreal Engine 5
 UE5: Retro Office Project - Create Beautiful Interior Env
 UE5: Master Material Creation - Create Master Materials in UE5
 Preproduction Blueprint: Plan Environments and Level Designs
TUTORIAL CATEGORIES
SUBSTANCE PAINTER ESSENTIALS

MAYA FOUNDATION COURSE

MODULAR ENVIRONMENTS MASTERCLASS

ABOUT WoLD & ALEXG

My name is AlexG. I am self-taught level designer, game environment artist and the creator of World of Level Design.com. I've learned everything I know from personal experimentation and decades of being around various online communities of fellow environment artist and level designers. On World of Level Design you will find tutorials to make you become the best level designer and game environment artist.
Home Terms of Use/Trademarks/Disclaimers Privacy Policy Donate About Contact
All content on this website is copyrighted ©2008-2024 World of Level Design LLC. All rights reserved.
Duplication and distribution is illegal and strictly prohibited.
World of Level Design LLC is an independent company. World of Level Design website, its tutorials and products are not endorsed, sponsored or approved by any mentioned companies on this website in any way. All content is based on my own personal experimentation, experience and opinion. World of Level Design™ and 11 Day Level Design™ are trademarks of AlexG.
Template powered by w3.css