World of Level Design™
Tutorials to Becoming the Best Level Designer and Game Environment Artist (since 2008)
Beginner's Guide to Your First Modular Base Mesh Kit for Environment Design Interiors and Exteriors
Category: Environment Art, Maya, UE5
October 14, 2026
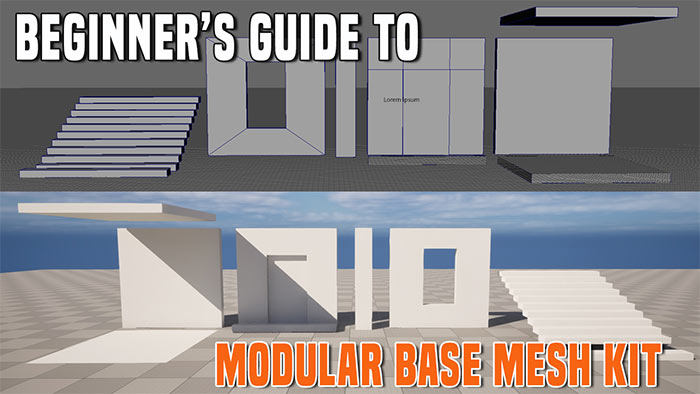
Modular environment asset design is one of the most powerful skills I've learned for creating game environments. Nothing matches the speed and reusability of building modular assets and combining them in different ways to create your environments.
This tutorial breaks down how to create a modular environment base mesh kit, which will become the foundation for everything else you build.
You will learn standard sizes and dimensions, pivot point placement, what to start with, how to export and import assets, how to use them in UE5 and common mistakes to avoid. Everything covered in this tutorial been tested and is practical and actionable. By the end, you will have a working modular base mesh kit ready to use and to expand upon.
Important Note: this tutorial covers only a portion of the full modular pipeline. For the complete design process, from base meshes through detailing, creating variations, UVs, texturing, materials, collisions, construction, lighting and finishing, get Modular Environment Design Masterclass tutorial course.
Video Tutorial
Maya Scene Setup
I've been using this scene setup for all my modular asset work. I've covered many of these setups in detail before, but here is a brief breakdown.
In Maya, go to Display > Grid Options and use these settings:
- Length and width: large enough for your viewport needs
- Subdivisions: 1
- Grid lines every: 10 units (10 cm)

Each grid square equals 10 cm, matching UE5 and making sure pieces snap together. You can change this value (e.g., 5 for finer control or 50 for larger units), but 10 units works well for most modular kits.
Tutorial: Maya/UE5: How to Match Grid Size and Dimensions in Maya to UE5 - EXPLAINED
I also have 2 scale references in every scene:
- A simple scale box matching human height in UE5 (180 cm / 180 units).
- A UE4/5 human scale mannequin for accurate proportion reference.
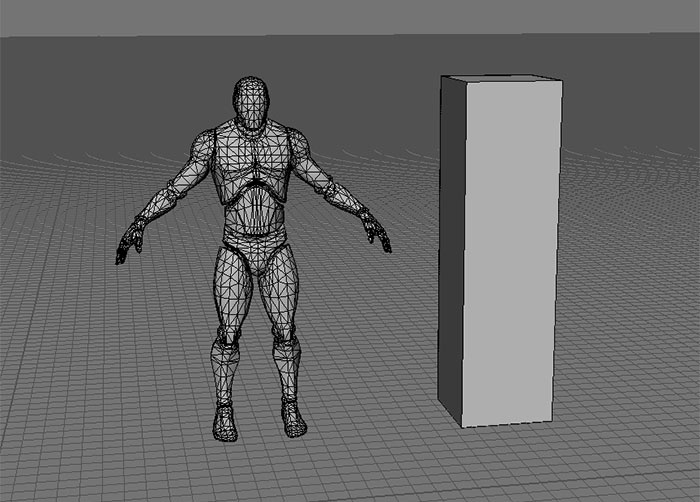
Tutorial: Maya/UE5: How to Export/Import UE5 Mannequin to Maya for Scale Reference
Creating the 4 Core Modular Base Meshes
Start with only 4 pieces. These will form the footprint for nearly all environments: wall, floor, ceiling and column. Technically you need only 3: ceiling, floor, wall but a column adds useful versatility.
Wall
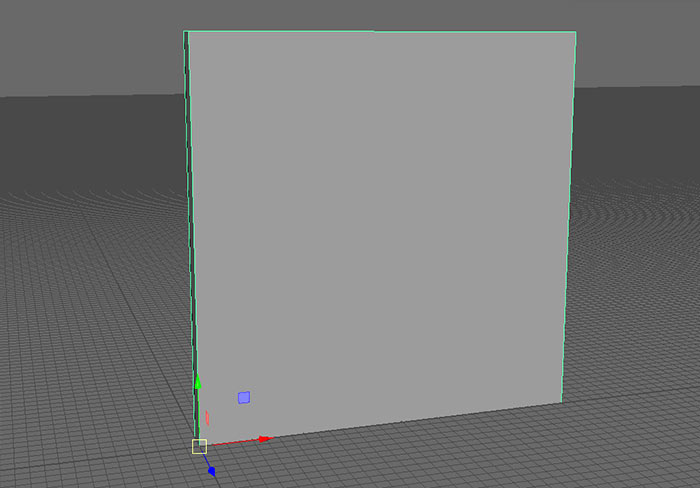
Create a cube with these dimensions (standard size I use for most UE4/UE5 environments; of course adjust it if the architecture style demands it):
- Width: 300 units
- Height: 300 units
- Depth: 20 units
Always give modular pieces thickness rather than using flat planes. Thick solid meshes work better with lighting and construction.
Tutorial: Flat Planes vs. Solid Boxes: Choosing the Right Modular Geometry for Environment Design and for UE5
Steps to Pivots, Mesh Placement and Prep
- Place the pivot at a bottom corner vertex (front or back).
- Hold D to enter pivot edit mode, hold V to snap to a vertex, then middle-mouse-drag.
- Snap the entire mesh (via its pivot) to the world origin (0,0,0) by holding X and middle-mouse-dragging.
- Freeze Transformations and Delete History so you can zero the translate values later and quickly return the piece to the origin for export.
- Rename it using a clear convention: wall_01_300 (name_version_size). You can expand the name to include height and depth if needed.
Floor
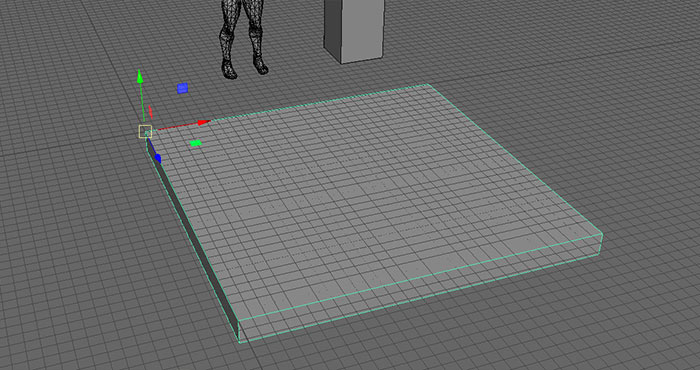
Use the same overall footprint so walls, ceilings and floors align:
- Width: 300
- Height: 20
- Depth: 300
Repeat the steps you did for the wall to prep the mesh, naming the mesh floor_01_300.
Ceiling
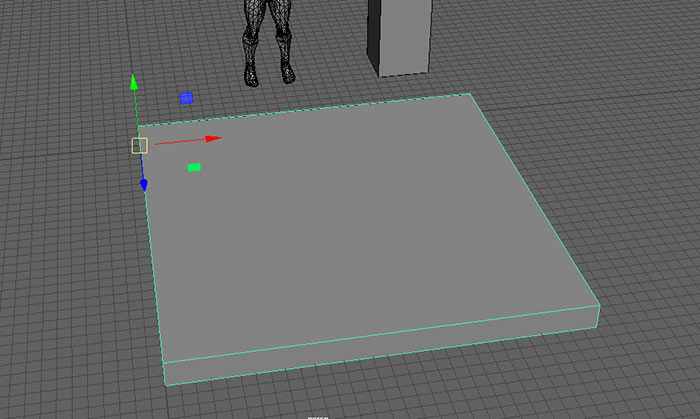
When you have to create similar meshes over and over again, you can speed up the process by duplicating already existing modular assets.
For ceiling, simply duplicate the floor. Then modify the pivot point to a bottom corner vertex (the reverse of the floor). Then rename to ceiling_01_300, snap the mesh to origin, Freeze Transformation and Delete History.
Column
Keep column height the same as the walls (300 units). Width and depth will be set 50×50 units but of course this will vary greatly with different architecture styles.
Place the pivot at the center and at the bottom of the column. Snap the mesh at its pivot point to world origin, Freeze Transformation, Delete History and name the mesh column_01_300 (or include full dimensions such as 300x50x50).
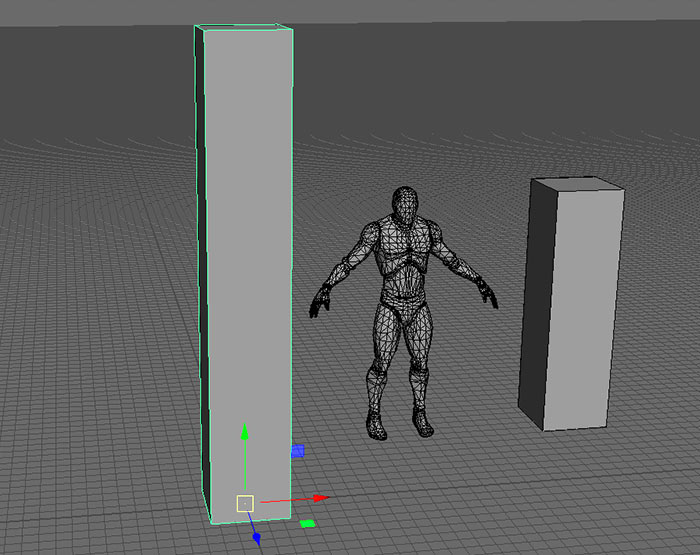
These 4 starter pieces (wall, floor, ceiling, column) form the core of your base mesh kit and create the modular environment footprint.
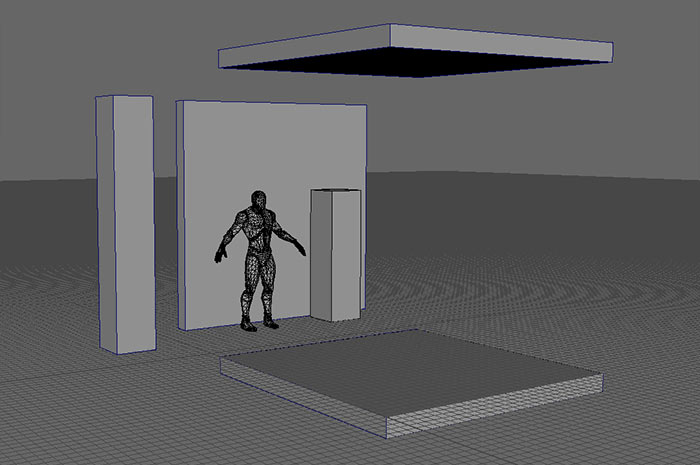
"Can I model in detail into these meshes?"
Do not model in detail YET. Once you confirm they work modularly in UE5, you can then add detail onto the same mesh footprint without breaking modularity. But that comes later in the pipeline process.
Exporting Assets from Maya
Select each mesh and bring it back to 0,0,0 world origin at their pivot point. This is where you need to export from.
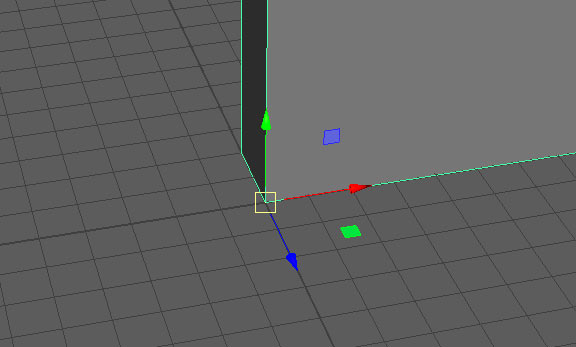
The pivot location on export becomes the pivot location on import. Exporting from anywhere else offsets the pivot and breaks modularity.
Select the mesh, go to File > Export Selection and set Files of Type: FBX.
Make sure the following settings are enabled for FBX:
- Smoothing groups enabled
- Smooth mesh enabled

Name the FBX export exactly the same as in Maya. This makes your base mesh kit easier to work with and make updates to.
Tutorial: Complete Guide to Exporting/Importing Environment Static Mesh Geometry from Maya into UE5
Importing Assets into UE5
Create or open your UE5 project and drag the exported FBX files into Content Browser to import. Of course, create sub-folders to better organize your project assets.
Here are some options I enable/disable during UE5 import:
- Build Nanite (optional; disable if you prefer not to use it)
- Generate missing collisions
- Do not create Material
- Do not import Textures
After import, create a simple off-white Material (e.g., M_Lambert) and assign it as the default Material on every imported Static Mesh until you create the Materials that will be used on these meshes.
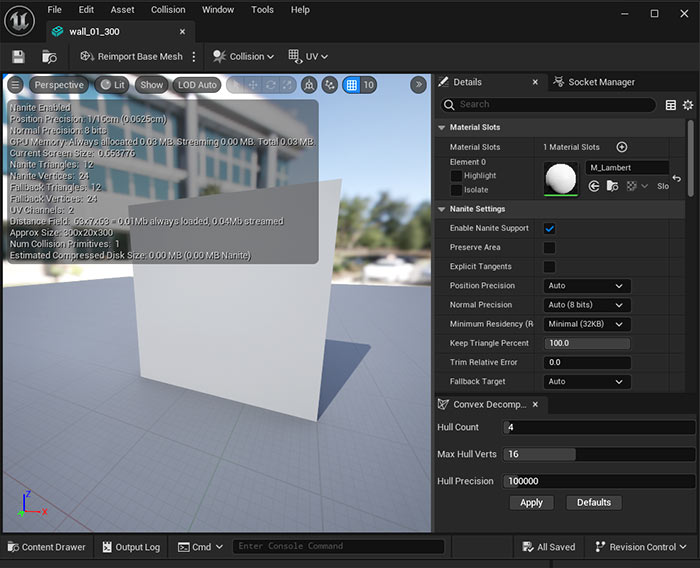
I like creating and using this off-white simple Material because the default world-grid texture is very distracting when prototyping modular assets.
Stress-Testing the Core Pieces
Immediately stress-test the 4 modular pieces. Build hallways and rooms of different sizes. Duplicate and snap walls, floors, and ceilings. Confirm everything stays on the grid and produces no gaps.
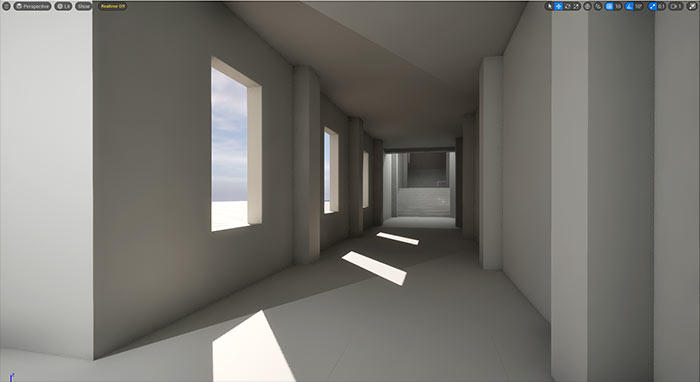
When stress testing the kit work on 10 unit grid spacing and snapping.
With columns you have 2 main approaches:
- Overlap the column into the walls (fine for simple walls; avoid if the wall has important surface detail you want to show).
- Leave a gap between walls equal to the column width and place the column between them.
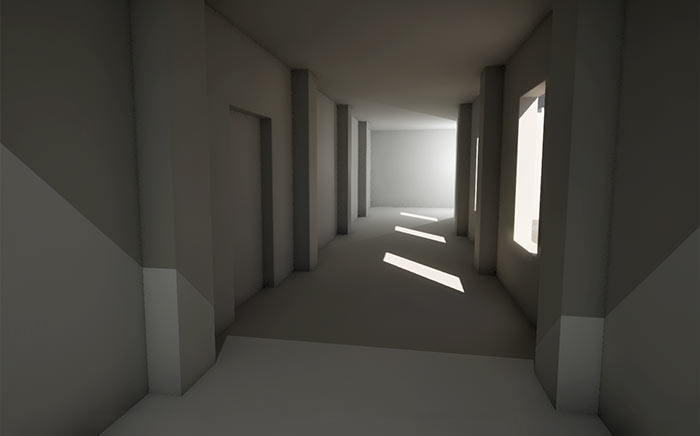
Overlapping meshes is common as long as faces do not occupy the exact same plane (which causes Z-fighting).
Also make sure to spawn into the level as the player and walk around. This will give you more accurate feel of the size and proportion of the environment and your modular assets.
Adding Doorway, Door, Window, and Gap Filler
Now let's create a doorway, door, windows and a gap filler.
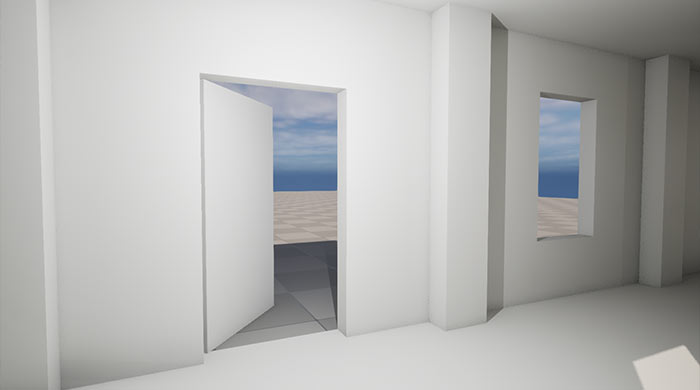
Doorway and window will share the same 300-unit footprint so they can be used with walls, floors and ceilings without breaking modularity.
Door
First create the door. It's dimensions will help to create the doorway.
Recommended door sizes that feel natural:
- Width: 110–140 cm (I used 120)
- Height: 210–230 cm (I used 220)
- Depth: 5 units
Place the pivot at the hinge-side bottom corner so the door opens realistically in one direction. Snap the door at its pivot point to world origin, Delete History and Freeze Transformations then rename the mesh to door_01.
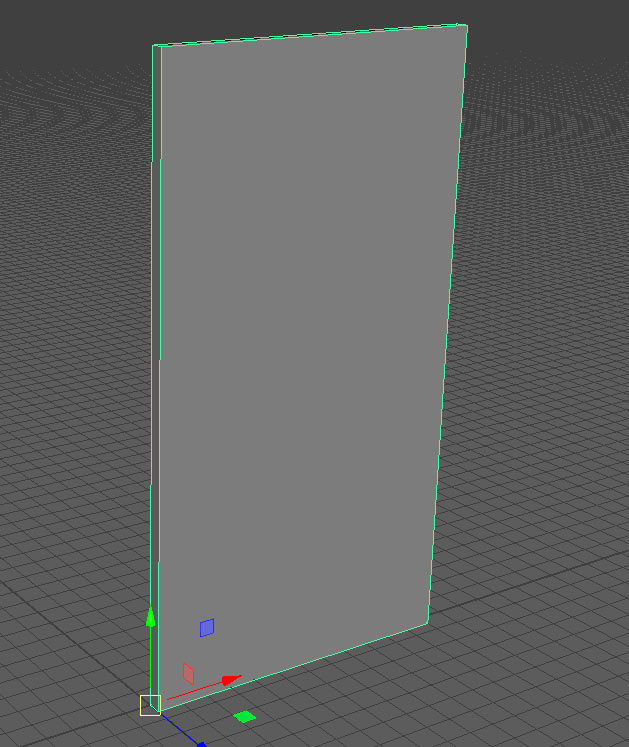
Doorway
Duplicate the wall to create the doorway. Then use the door as a template to know where to place additional edges so you can create the door opening.
Center the door on the wall (equal grid squares on each side), cut the opening with Multi-Cut, delete the faces and create faces between open edges.
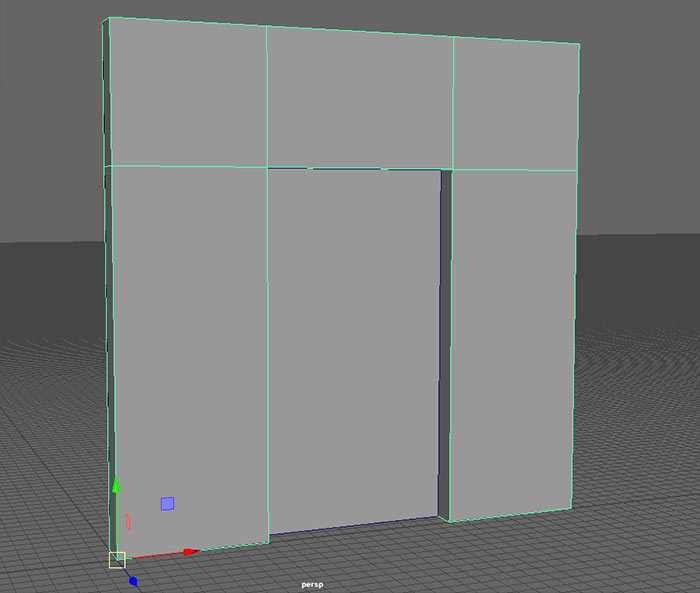
Rename the mesh to doorway_01_300.
Window
Duplicate the wall again to use for the window. Cut a centered rectangular opening for the window.
Snap the window at its pivot point to world origin, Delete History and Freeze Transformations then rename the mesh to window_01_300.
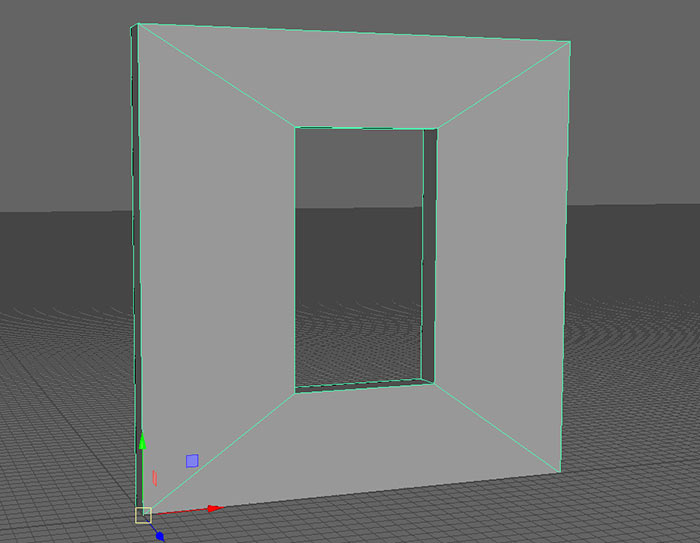
Remember: the pivot point placement should remain consistent at bottom vertex for the wall, doorway and window.
Gap Filler/Threshold
When a doorway sits on a continuous floor, 20 unit gap often appears under the doorway. You could use the floor to close the gap but I like to create gap fillers for this. In this case, it will act like a threshold below the door.
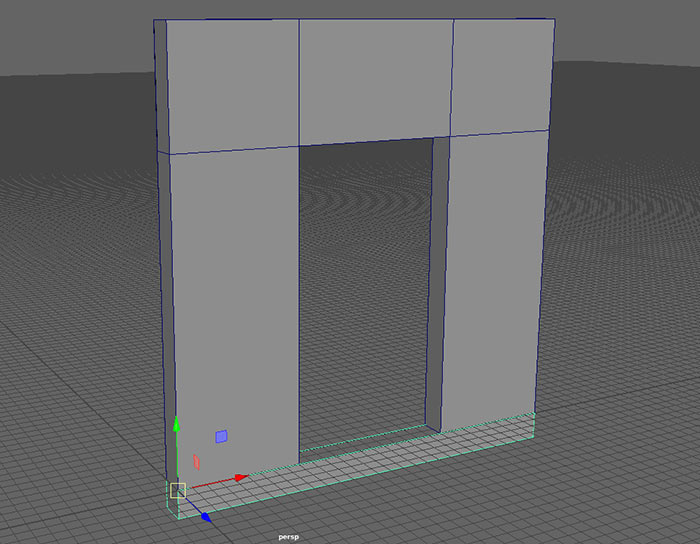
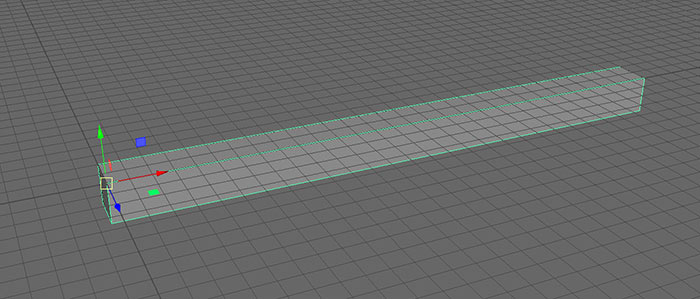
Create a mesh 300×20×20 that will sit under the doorway and aligns with the floor.
Follow the steps I outlined above to prep the mesh for export.
I named this mesh: gap_300x20.
Export/Import
Export all 4 new meshes using the same options as before. Then import them to UE5.
Assign the Lambert material and continue stress-testing: swap walls for doorways or windows, place doors, fill gaps, and verify everything still snaps cleanly.
Adding Stairs
Keep the same 300-unit width so stairs fit into the existing footprint.
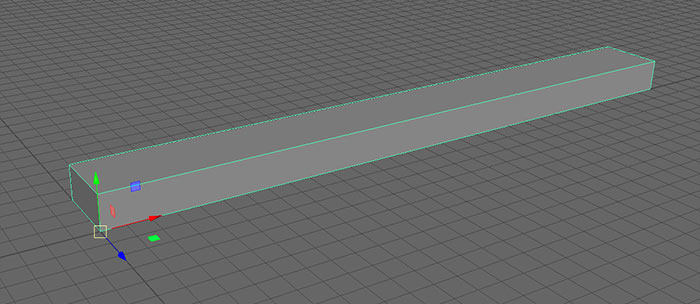
Single step dimensions:
- Width: 300
- Height: 15
- Depth: 30
Place pivot at the front-bottom vertex. Rename: stair_01_single_300.
Stair Section (half-floor)
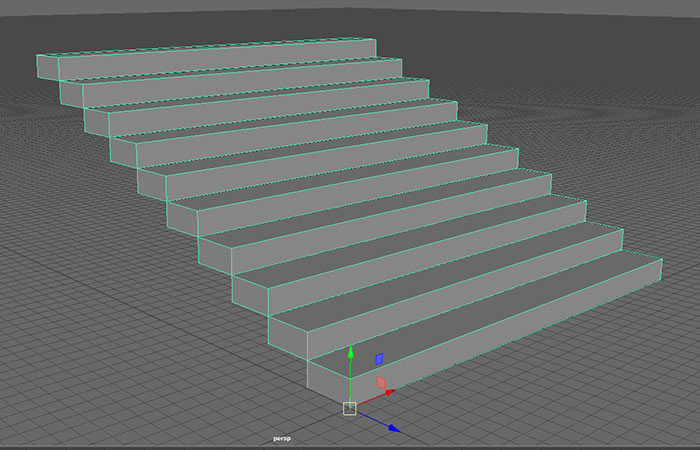
Duplicate the single step ten times (15 × 10 = 150 units) to reach half the standard floor height.
Combine all the stairs into a single mesh, set the pivot to the bottom-front corner and rename: stairs_01_300.
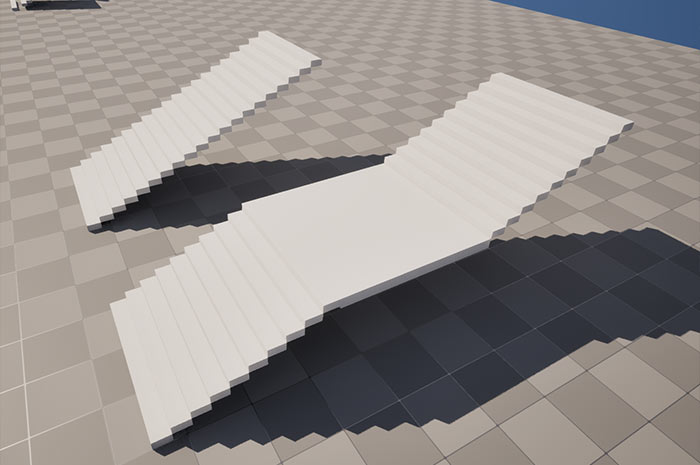
Two of these meshes reach a full 300-unit floor. This approach gives more flexibility than a single 20-step piece (you can create landings, change direction at half-floors).
Export the single step and the combined staircase out of Maya then import into UE5. Assign the Material and test.
Next Steps
With this 10-piece modular base mesh kit you can already start building interiors and exteriors.
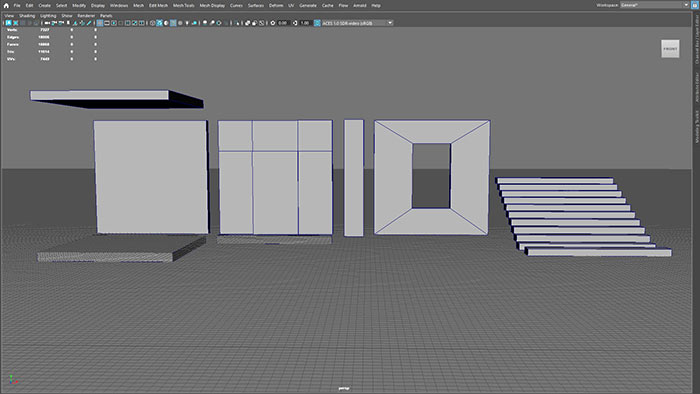
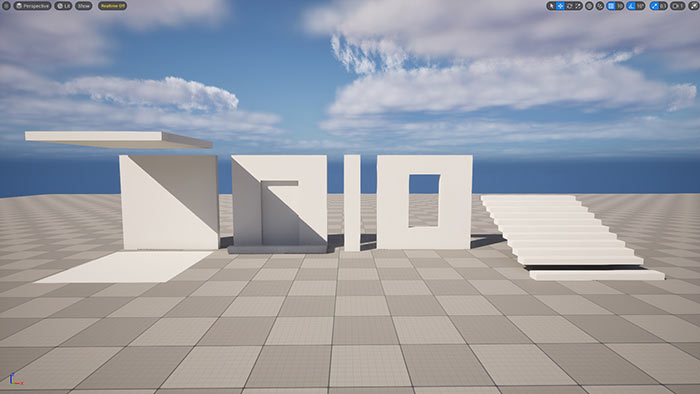
But we are just getting started. There is a lot more you need to do to make this into game-ready modular asset pack.
You will need to:
- Detail
- Create variations
- UV
- Texture
- Create Materials and Instances
- Collisions
- Lighting
- Create and finish the environment
I will guide you through the complete step-by-step pipeline in this extensive and complete Modular Environment Design Masterclass tutorial course.
So, let's continue, get the full tutorial course.

SUBSCRIBE & GET FREE, UPDATED PDF GUIDE
Subscribe to receive FREE & Updated "Maya 3D Primer" PDF Guide (200+ pages).
See more about this Free PDF Guides and what you are subscribing to.
TOP 7 TUTORIAL COURSES FOR 2026
 Modular Environment Design Masterclass Tutorial Course
 Maya Foundation: Home-Study Course - Model and UV Environments
 Substance 3D Painter Essentials - Master Texturing
 UE5: Fundamentals Vol.1 - Create with Unreal Engine 5
 UE5: Retro Office Project - Create Beautiful Interior Env
 UE5: Master Material Creation - Create Master Materials in UE5
 Preproduction Blueprint: Plan Environments and Level Designs
TUTORIAL CATEGORIES
MAYA FOUNDATION COURSE

MODULAR ENVIRONMENTS MASTERCLASS
UE5: RETRO OFFICE PROJECT

SUBSTANCE PAINTER ESSENTIALS

UE5 FUNDAMENTALS VOL.1 COURSE
EVERYTHING I KNOW ABOUT PLANNING

ABOUT WoLD & ALEXG

My name is AlexG. I am self-taught level designer, game environment artist and the creator of World of Level Design.com. I've learned everything I know from personal experimentation and decades of being around various online communities of fellow environment artist and level designers. On World of Level Design you will find tutorials to make you become the best level designer and game environment artist.
Home Terms of Use/Trademarks/Disclaimers Privacy Policy Donate About Contact
All content on this website is copyrighted ©2008-2024 World of Level Design LLC. All rights reserved.
Duplication and distribution is illegal and strictly prohibited.
World of Level Design LLC is an independent company. World of Level Design website, its tutorials and products are not endorsed, sponsored or approved by any mentioned companies on this website in any way. All content is based on my own personal experimentation, experience and opinion. World of Level Design™ and 11 Day Level Design™ are trademarks of AlexG.
Template powered by w3.css